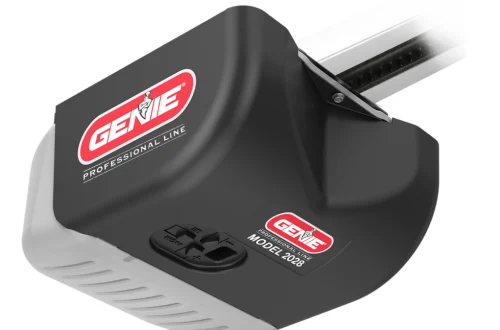


Do you want to learn how to program Genie garage door opener remotes, keypads, or car buttons? You can usually complete the process yourself without hiring a technician. Most Genie garage door openers have a programming button that helps connect wireless accessories to the motor unit.
However, the instructions are not exactly the same for every model. Newer Genie openers commonly use a PROGRAM or PRGM/SET button, while many older models have a LEARN CODE button. Some very old garage door openers use a different system with physical code switches.
This guide explains how to program a Genie garage door opener, connect a new remote, set up a wireless keypad, program your car’s HomeLink system, and solve common problems.
Whether you have recently purchased a Genie door opener, lost your old remote, or want to give another family member access, the following instructions will help you get started.
Quick Answer: How to Program a Genie Garage Door Opener?
If your Genie garage door opener has a PROGRAM or PRGM/SET button, follow these steps:
- Find the PROGRAM button on the garage door opener motor.
- Press and hold it until the round LED turns blue.
- Release the button. The longer LED should start flashing purple.
- Press and release the button on your Genie remote.
- Press and release the same remote button again.
- Watch for the opener’s indicator LEDs to flash and turn off.
- Press the remote button again to test the garage door.
If your opener has an older LEARN CODE button, press and release that button once, then press the chosen remote button twice to complete pairing. Press it a third time to operate the door.
Important: These instructions apply to compatible Genie Intellicode remotes. Universal remotes, very old openers, and certain other accessories may require different steps.
What Is a Genie Garage Door Opener?
A Genie garage door opener is an electric device designed to raise and lower a garage door. The motor is normally installed on the garage ceiling and connected to the door through a rail and drive mechanism.
Genie manufactures different types of garage door openers, including belt-drive, chain-drive, and other model-specific systems.
Many Genie garage door openers support wireless remotes, keypads, and compatible vehicle controls.
A typical system includes:
- Motor unit: The main opener installed above the garage door.
- Remote control: A handheld device that operates the door wirelessly.
- Wall console: A control installed inside the garage.
- Wireless keypad: An outdoor device that lets you enter a PIN.
- Safety sensors: Devices near the bottom of the garage door opening that help prevent the door from closing on an obstruction.
- Programming button: A button used to connect compatible remotes and accessories.
Some models also support smartphone control through Genie Aladdin Connect or other supported connected features.
How Does Genie Intellicode Technology Work?
Many Genie garage door opener models use Intellicode technology.
Intellicode is a rolling-code wireless system. Instead of transmitting the same fixed code every time, compatible remotes use changing security codes.
This helps reduce the risk of someone capturing a signal and reusing it to operate your garage door.
Genie has used different generations of Intellicode technology. This is one reason that an older remote may not work with a newer opener until the correct operating mode is selected.
Before you begin programming, make sure your remote and garage door opener are compatible.
Things You Need Before Programming a Genie Garage Door Opener
Most Genie remote programming procedures do not require special tools.
However, preparing everything before you start can help prevent mistakes.
| Item | Why You Need It |
|---|---|
| Genie garage door opener | The motor unit you want to program |
| Compatible remote | To control the garage door |
| Working remote battery | To send a reliable wireless signal |
| Stable stepladder | To reach the programming button safely |
| Owner’s manual | To confirm model-specific instructions |
| Wireless keypad | Optional, for PIN-based access |
| Vehicle with HomeLink | Optional, for in-car control |
Important Safety Precautions
Garage doors are heavy, and an automatic garage door can cause serious injuries.
Before programming:
- Keep children and pets away from the garage door.
- Remove vehicles and other objects from the door’s path.
- Make sure the opener has power.
- Use a stable ladder on a level surface.
- Never stand beneath a moving garage door.
- Keep hands away from springs, cables, rollers, and moving components.
- Do not use an opener with damaged or malfunctioning safety sensors.
You do not need to disconnect the garage door springs or open the motor housing to program a normal remote.
If the door is damaged, unbalanced, or moving unpredictably, stop using the opener and contact a qualified garage door technician.
How to Find the Program or Learn Button on a Genie Garage Door Opener?
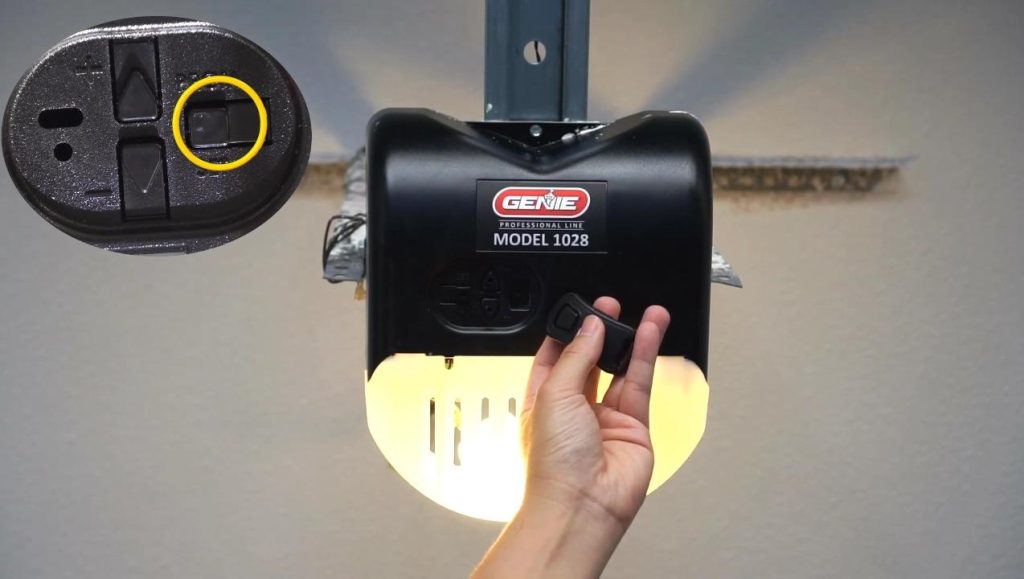
The first step is identifying which programming system your Genie door opener uses.
The location and appearance of the button depend on the model.
Newer Genie Garage Door Openers
Many newer Genie garage door openers have a button labeled:
- PROGRAM
- PRGM
- PRGM/SET
It is generally located on the motor unit near other controls or programming indicator lights.
You may see a round LED and a longer LED beside the programming controls.
The round LED turns blue when you enter programming mode, and the longer LED begins flashing purple.
Older Genie Garage Door Openers
Many Genie models manufactured from approximately 1995 through 2011 use a LEARN CODE button.
This button may be located:
- On the rear of the motor housing
- Near the antenna wire
- Beneath the opener’s light cover
- Beside a small red indicator light
Pressing and releasing the LEARN CODE button once activates programming mode.
How to Identify Your Genie Opener?
| Opener type | Programming control | Expected indicator |
|---|---|---|
| Newer Intellicode opener | PROGRAM or PRGM/SET | Blue round LED followed by flashing purple LED |
| Older Intellicode opener | LEARN CODE | Flashing red LED |
| Very old fixed-code opener | Physical code switches | Usually no modern learning sequence |
| Certain commercial openers | Model-specific controls | Depends on the model |
These descriptions are general identification guides. Always check the model number and owner’s manual if your controls look different.
How to Program a Newer Genie Garage Door Opener Remote?
If your Genie garage door opener has a PROGRAM or PRGM/SET button, use the following method.
This procedure applies to many modern Genie Intellicode openers with compatible remotes.
Step 1: Check Your Genie Remote
Start by checking the remote battery.
If you are using a new remote, remove any protective battery tab.
Press a remote button to see whether the indicator light responds, if your remote has one.
A weak or dead battery can prevent successful programming.
Also confirm that your remote supports your opener’s Intellicode system.
Step 2: Locate the PROGRAM Button
Go to the garage door opener motor mounted on the ceiling.
Use a ladder if necessary.
Look for the PROGRAM or PRGM/SET button, usually near the programming indicator LEDs.
Do not remove electrical covers or touch internal components.
Step 3: Activate Programming Mode
Press and hold the PROGRAM button until the round LED lights up blue.
Release the button.
The round blue LED should turn off, and the longer LED should begin flashing purple.
This indicates that the opener is ready to learn a compatible remote signal.
If the expected lights do not appear, consult your model’s manual before continuing.
Step 4: Press Your Genie Remote Button
Choose the button on your Genie remote that you want to use.
Press and release the chosen button once.
The longer LED on the motor unit should stop flashing and become steady purple.
Press and release the same remote button again.
The opener’s LEDs should flash blue and turn off.
This indicates that programming has been accepted.
Step 5: Test the Remote
Move to a safe position where you can see the garage door.
Press and release the programmed remote button again.
The garage door should begin moving.
If it works, your Genie garage door opener remote has been programmed successfully.
Step 6: Repeat for Additional Remotes
If you have another compatible remote, repeat the process.
Each remote button must be programmed separately.
For example, if you want two family members to use separate remotes, you can add each remote individually without deleting the other one.
Helpful tip: Avoid pressing the buttons too quickly. Allow the indicator lights to respond between presses.
How to Program an Older Genie Garage Door Opener?
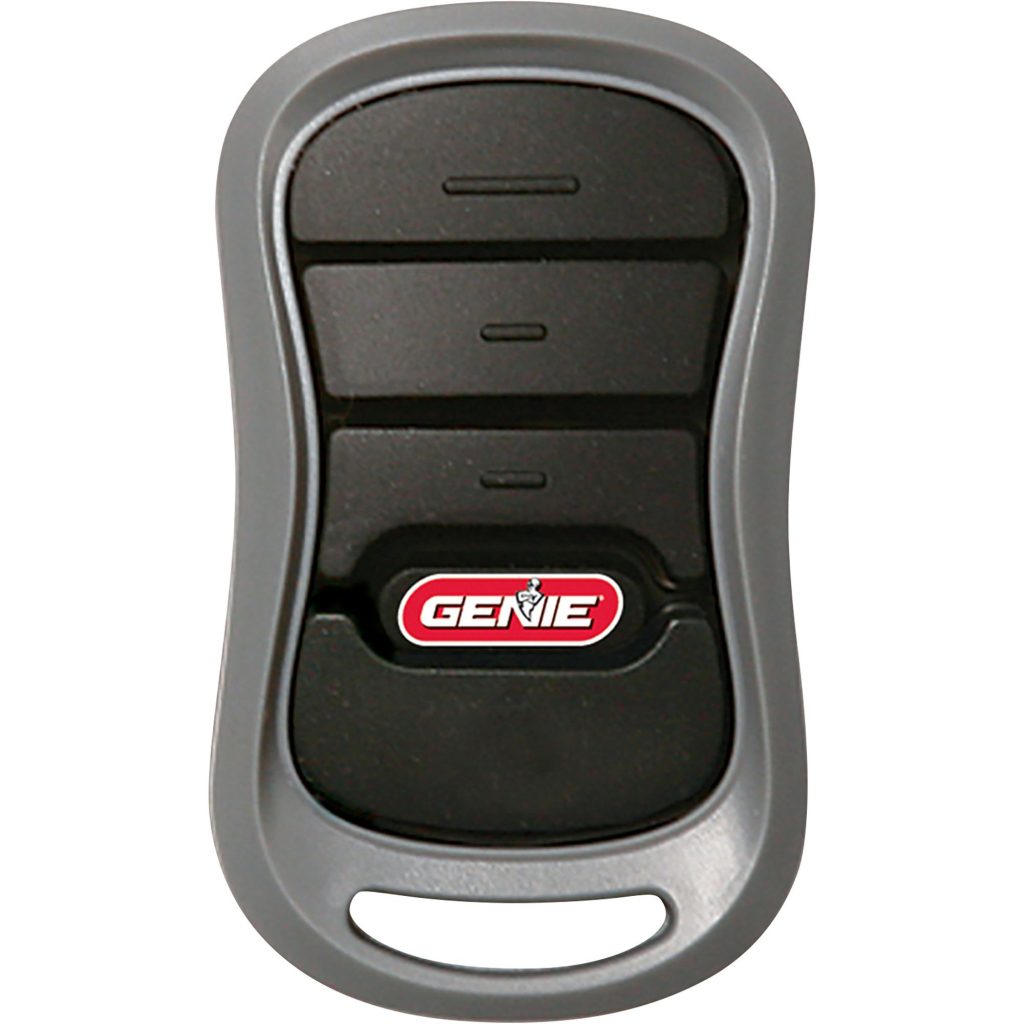
Older Genie garage door openers often use a LEARN CODE button.
This method is commonly associated with Intellicode openers manufactured during the 1995–2011 period, although model-specific differences exist.
Step 1: Find the LEARN CODE Button
Look at the motor unit for a button labeled LEARN CODE.
It is commonly located near a small red LED or antenna wire.
On some models, you may need to open the normal light lens to access the programming controls.
Step 2: Press and Release LEARN CODE
Press and release the button once.
The red indicator LED should begin blinking.
Do not continuously hold the LEARN CODE button.
On these older systems, holding the button can erase stored remote programming.
Step 3: Press Your Remote Button
Press and release the remote button you want to use.
The red LED on the motor unit should stop blinking and remain illuminated.
This indicates that the opener has received the remote signal.
Step 4: Press the Same Button Again
Press and release the same remote button for a second time.
The red LED should turn off.
The pairing process should now be complete.
Step 5: Test the Garage Door
Press the remote button a third time.
The garage door should open or close.
If it does, the remote is programmed correctly.
For many older Genie openers, the learning window lasts approximately 30 seconds. If the LED stops blinking before you finish, activate learning mode again.
What About Genie Openers Made Before 1995?
Some very old Genie garage door openers use physical code switches instead of Intellicode learning.
These openers may have a row of small switches inside the remote and receiver.
Their programming process involves matching the switch settings rather than pressing a modern PROGRAM button.
Do not assume that a current Intellicode remote will work with a fixed-code opener.
Check the exact opener and remote model numbers. If you are unsure about compatibility or safety, contact Genie support.
How to Program a Genie Garage Door Opener Keypad?
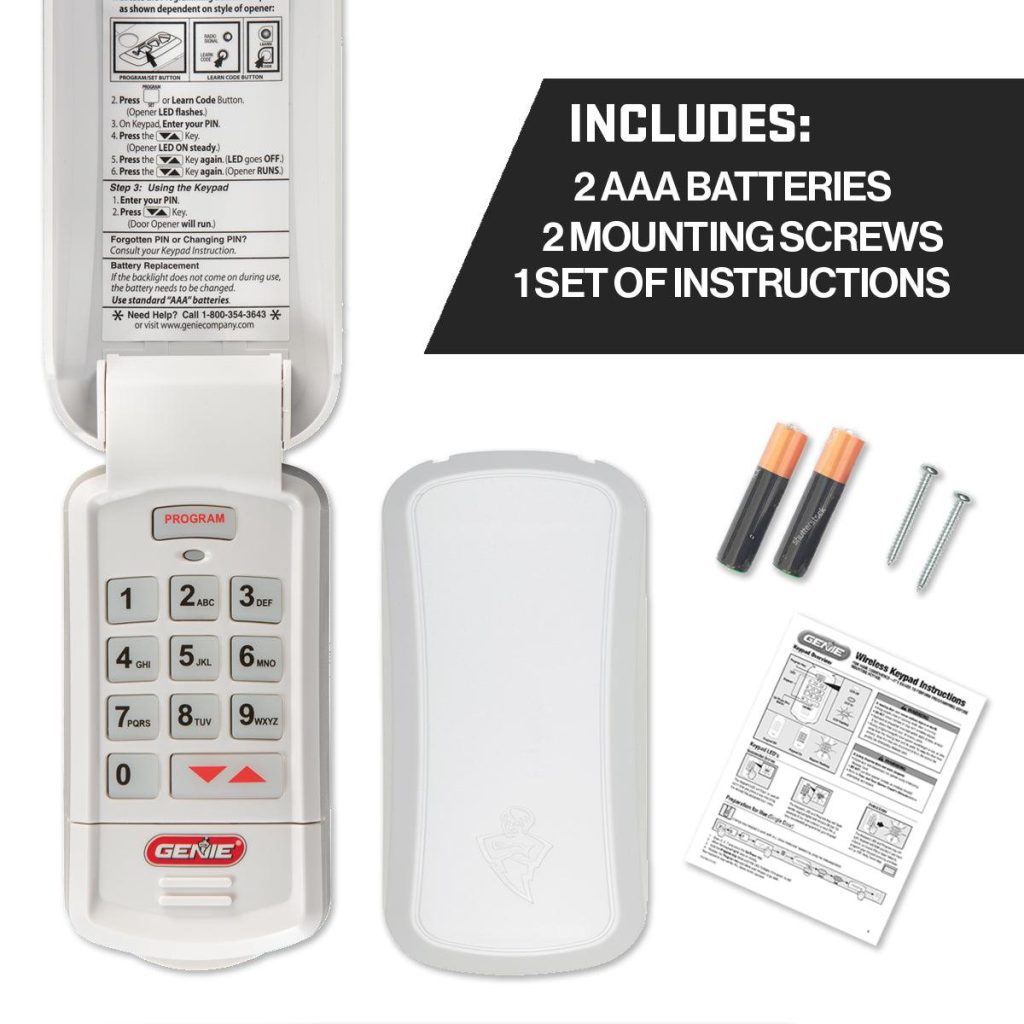
A Genie wireless keypad allows you to open your garage door by entering a personal identification number.
This is useful when you want to access the garage without carrying a remote.
The following instructions apply to the Genie GK-R wireless keypad.
Other Genie keypads, including some older or newer models, may have different instructions.
Step 1: Activate the Wireless Keypad
If you have a new keypad, open the battery compartment.
Remove the protective battery tab if one is present.
Close the battery cover.
Make sure the keypad lights turn on when you press a button.
Step 2: Create Your Personal PIN
The Genie GK-R keypad uses a PIN containing three to eight digits.
To create your PIN:
- Wait until the keypad backlight is off.
- Press 3, 5, and 7 in sequence.
- Press the PROGRAM button.
- Enter your chosen three- to eight-digit PIN.
- Press PROGRAM again.
The keypad LED should blink twice and then turn off.
Your PIN has now been stored in the keypad.
Security tip: Avoid obvious PINs such as 1234, 0000, or a publicly known address number.
Step 3: Activate Programming Mode on the Motor
Go to your Genie garage door opener.
For a newer opener:
- Press and hold PROGRAM until the round LED becomes blue.
- Release the button.
- Wait for the longer LED to flash purple.
For an older opener:
- Find the LEARN CODE button.
- Press and release it once.
- Look for the red LED to flash.
Step 4: Connect the Keypad to Your Opener
Return to the keypad.
Wait until its backlight is off.
Enter the PIN you created.
Press the UP/DOWN button slowly three or four times, stopping when the garage door opener operates.
Your keypad should now be connected to the opener.
Step 5: Test the Keypad
Wait until the keypad lights turn off.
Enter your PIN.
Press the UP/DOWN button.
The garage door should move.
If it operates normally, you have successfully programmed your Genie wireless keypad.
How to Reset a Genie GK-R Wireless Keypad?
If you forget your PIN or want to start over, you can reset the GK-R keypad.
- Wait until the keypad backlight is off.
- Press and hold PROGRAM and UP/DOWN together for approximately five seconds.
- Wait for the LED to flash twice and the lights to turn off.
- Release the buttons.
- Create a new PIN using the initial setup instructions.
- Pair the keypad with the opener again.
This factory reset clears the keypad’s programming. It is different from erasing all wireless devices from the garage door opener motor.
How to Program a Genie Garage Door Opener to Your Car?
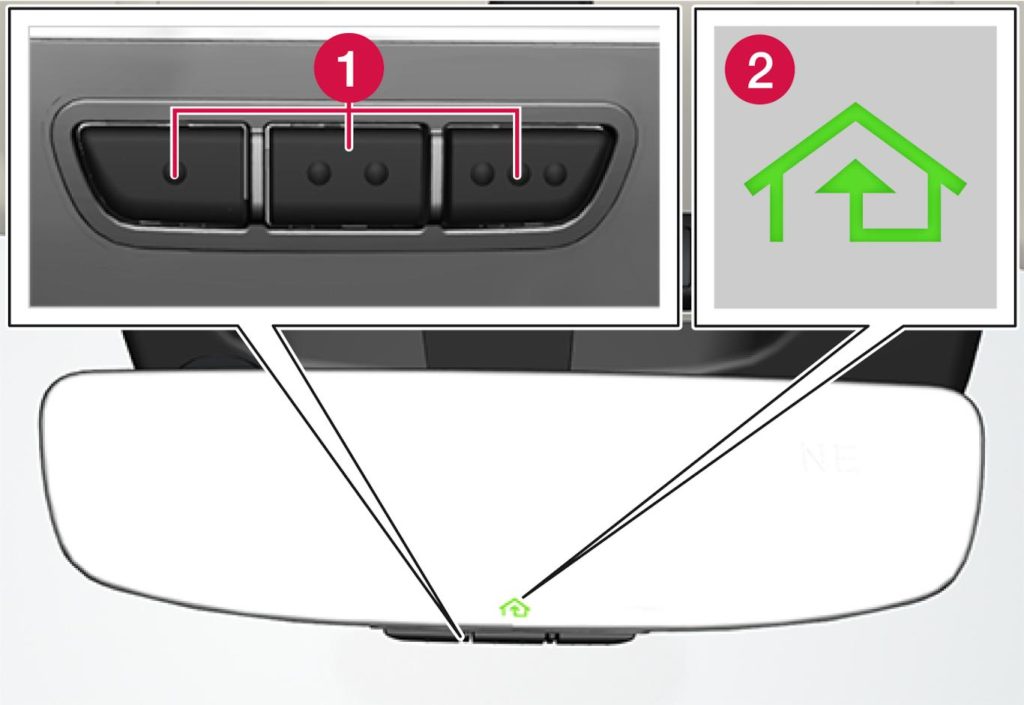
Many vehicles include a built-in garage door opener system called HomeLink.
HomeLink typically uses buttons located on the sun visor, overhead console, or rearview mirror.
If your car has compatible HomeLink equipment, you can use these buttons instead of a separate handheld Genie remote.
Step 1: Check HomeLink Compatibility
Read your vehicle’s owner’s manual to confirm that it supports HomeLink.
The programming procedure may depend on the vehicle model, year, and HomeLink generation.
You will generally need a working compatible Genie remote to train the HomeLink transmitter.
Step 2: Choose a HomeLink Button
Sit inside your vehicle with the Genie remote.
Choose the HomeLink button you want to program.
If that button is already assigned to another garage door, make sure you are comfortable replacing its existing programming.
You generally do not need to erase every HomeLink button just to program one unused button.
Step 3: Train HomeLink With the Genie Remote
Hold the working Genie remote approximately two inches from the HomeLink controls.
Press and hold the button on the Genie remote.
At the same time, press and hold your chosen HomeLink button.
Watch the HomeLink indicator.
When the indicator changes from a slow flash to a rapid flash, release both buttons.
This usually indicates that HomeLink has learned the handheld remote signal.
Step 4: Put the Genie Opener Into Programming Mode
For a newer Genie opener:
- Press and hold PROGRAM until the round LED turns blue.
- Release the button.
- Wait for the longer LED to flash purple.
For an older LEARN CODE opener, press and release LEARN CODE once.
Step 5: Finish the HomeLink Connection
For a newer opener, press and hold the chosen HomeLink button for approximately two seconds, then release it.
Repeat this action.
The opener’s indicator lights should respond.
Press the HomeLink button again as needed to test door movement.
For an older LEARN CODE opener, press the HomeLink button once after activating learning mode, press it again to complete the pairing, and then press it a third time to test the door.
Step 6: Test Your Car’s Garage Door Button
Make sure the garage door opening is clear.
Press the programmed HomeLink button.
The garage door should respond.
If it does not, check the HomeLink instructions for your specific vehicle. Some vehicle models have additional steps or compatibility requirements.
How to Program Multiple Genie Garage Door Opener Remotes?
You may want multiple garage door remotes for different family members or vehicles.
For example:
- One remote for your car
- One remote for your partner’s car
- One remote stored securely inside the house
Most compatible Genie systems allow multiple wireless devices to be learned.
Programming Additional Remotes
To program another remote:
- Check that the additional remote is compatible.
- Put the Genie motor into its normal programming mode.
- Press the chosen button on the additional remote.
- Complete the programming sequence for your opener model.
- Test the newly programmed remote.
- Confirm that your previously programmed remotes still work.
You normally do not need to erase existing remotes when adding a new one.
Can One Genie Remote Operate Two Garage Doors?
Yes, certain multi-button Genie remotes can operate more than one compatible garage door opener.
For example, with a compatible three-button remote, you may assign:
- Button 1 to Garage Door A
- Button 2 to Garage Door B
- Button 3 to Garage Door C
Each button must be separately paired with the appropriate opener.
The number of doors you can control depends on your remote model.
Do not assume that every multi-button remote has the same compatibility or programming procedure.
How to Program a Genie Keypad for Multiple Garage Doors?
The Genie GK-R wireless keypad can operate up to three compatible garage door openers.
It uses one PIN for all connected doors.
Step 1: Program Your PIN
Follow the normal GK-R PIN setup procedure.
Wait until the keypad is off, enter 3-5-7, press PROGRAM, enter your preferred PIN, and press PROGRAM again.
Step 2: Set the Number of Doors
- Wait for the keypad backlight to turn off.
- Enter your programmed PIN.
- Press PROGRAM twice.
- Enter the number of garage door openers you want to control: 2 or 3.
- Press PROGRAM once.
The LED should blink twice and turn off.
Step 3: Pair Each Garage Door
Place the first opener into programming mode.
Then:
- Enter the keypad PIN.
- Press UP/DOWN once.
- Press the number assigned to the garage door, such as 1.
- Press UP/DOWN slowly three or four times until the opener operates.
Repeat the process for the second or third opener, assigning each one a different door number.
Step 4: Operate the Selected Door
To operate a specific garage door:
- Enter your PIN.
- Press UP/DOWN.
- Press the number assigned to the door.
The selected garage door should operate.
How to Reset Genie Garage Door Opener Remote Programming?
There are situations where you may need to erase all wireless access stored in your Genie garage door opener.
For example, you may have lost a remote, moved into a new house, or discovered that someone who no longer needs access still has a working transmitter.
Resetting the opener’s remote memory can help prevent previously paired remotes from operating the door.
Important: Erasing remote memory is not the same as resetting the door’s travel limits, force settings, or mechanical adjustments.
Resetting a Newer Genie Opener
For many newer Genie models:
- Locate the PROGRAM button on the motor unit.
- Press and hold PROGRAM until the round LED turns blue.
- Release the PROGRAM button.
- Press and hold the UP (+) and DOWN (-) buttons together.
- Release them when the LEDs display the memory-clearing confirmation described in your model’s manual.
- Test the previously programmed remotes to confirm they no longer activate the opener.
After clearing the memory, reprogram every remote and wireless keypad you still want to use.
Resetting an Older Genie Opener
For many older Intellicode openers:
- Locate the LEARN CODE button.
- Press and hold it until the indicator stops blinking, as specified by the model instructions.
- Release the button.
- Test the old remotes.
- Reprogram the remotes you still use.
What Happens After Resetting?
Clearing the motor’s remote memory normally disables its previously stored handheld remotes, wireless keypads, and programmed vehicle transmitters.
It does not necessarily erase separate smartphone integrations or every type of wall control.
After a memory reset, test all access methods and follow the relevant instructions for any connected accessory.
Genie Garage Door Opener Not Programming? Common Problems and Fixes
Sometimes, a Genie garage door opener does not respond even when you follow the programming instructions.
The problem may involve the battery, model compatibility, programming sequence, or opener settings.
Use the following troubleshooting table to identify a likely cause.
| Problem | Possible reason | What to do |
|---|---|---|
| Remote light does not turn on | Dead battery | Replace with the specified battery |
| Remote will not pair | Wrong programming sequence | Identify the opener type and repeat |
| Opener LED does not respond | Wrong button or power problem | Check power and model instructions |
| Remote works only nearby | Battery or radio interference | Replace battery and retest |
| Keypad rejects PIN | Incorrect PIN or keypad setup | Reset and reprogram the keypad |
| Door opens but will not close | Safety sensor or door issue | Inspect sensor status and stop if unsafe |
| New remote does not work | Incompatible transmitter | Verify the remote model |
| Existing remote stops working | Memory erased or pairing lost | Reprogram it |
| HomeLink will not connect | Vehicle compatibility or incomplete setup | Follow vehicle-specific instructions |
| Remote works but keypad does not | Keypad problem | Check batteries and keypad pairing |
Problem 1: Genie Remote Is Not Responding
If your remote does not respond, start with the battery.
Open the battery compartment according to the remote’s instructions.
Check the battery type and polarity.
For example, some Genie G3T remote models use a CR2032 coin-cell battery.
Other Genie remotes may use a different battery.
Replace the battery with the correct type and test the remote again.
If the issue continues, repeat the programming process.
Keep loose coin-cell batteries away from children.
Problem 2: Genie Opener Will Not Enter Programming Mode
Check whether the opener has electrical power.
If the opener has no power, inspect its normal power supply and any relevant circuit breaker.
Do not open the motor’s electrical housing.
Confirm you are pressing the correct button.
A PROGRAM button and a LEARN CODE button do not always use the same sequence.
If the expected LED indicators do not appear, look up your exact model’s manual.
Problem 3: Remote Works Only When Close to the Garage
A remote with a weak battery may work only over a short distance.
Replace the battery and test again.
Also check for potential wireless interference from nearby electrical equipment.
Make sure the opener’s antenna is not visibly damaged.
Avoid modifying the antenna or electrical components yourself.
If the operating range remains unusually short, contact Genie support.
Problem 4: Genie Garage Door Opener Opens but Does Not Close
This problem is not always related to programming.
The garage door may have a safety sensor issue.
Inspect the photo-eye sensors near the floor.
Check for:
- Objects blocking the beam
- Dirt on the sensor lenses
- Misaligned sensors
- Visible damage
- Loose or damaged wiring
Clean the lenses gently and remove any obstructions.
Never bypass or disconnect the safety sensors to force normal operation.
If the sensors are not functioning properly, stop using the opener until the issue is corrected.
Problem 5: Genie Keypad Is Not Working
If your wireless keypad stops responding, check the batteries.
For the Genie GK-R model, the keypad uses two AAA batteries.
After replacing the batteries, test the keypad again.
If the keypad lights work but the opener does not respond, confirm that the PIN is correct.
You may also need to repeat the keypad pairing process.
If you cannot remember the PIN, use the factory reset procedure for your particular keypad model.
Problem 6: Genie Remote Works Sometimes but Not Always
Intermittent operation can have several causes.
Try these steps:
- Replace the remote battery.
- Test the remote from different safe locations.
- Verify that the garage door opener has reliable power.
- Check for a wall-console lock or vacation mode.
- Look for visible antenna damage.
- Repeat remote programming if necessary.
If the door responds to the wall console but not to multiple wireless remotes, the issue may involve the remote receiver, wireless interference, or system settings.
A qualified technician or Genie support can help diagnose persistent problems.
How to Change the Battery in a Genie Garage Door Opener Remote?
Many Genie remote problems are caused by weak batteries.
Replacing the battery is usually simple.
Step 1: Identify the Remote Model
Look at the back of your remote for its model number.
Check the owner’s manual to identify the correct replacement battery.
Do not assume that every Genie remote uses a CR2032 battery.
Step 2: Open the Remote Housing
Some models have a battery cover.
Others require carefully separating the remote housing using the specified opening slot.
Avoid using excessive force.
Step 3: Remove the Old Battery
Take out the old battery.
Notice the position of the positive and negative terminals.
Step 4: Install the New Battery
Insert the correct replacement battery with the proper polarity.
Close the remote securely.
Step 5: Test the Remote
Press the remote button and check whether the opener responds.
Normally, changing the battery does not require the remote to be paired again.
If the opener still does not respond, follow the remote troubleshooting and programming instructions.
Genie Garage Door Opener Programming Tips
Following a few simple practices can make programming more reliable.
1. Identify the Model First
Before starting, find the model number on the motor unit or remote.
This helps you choose the correct programming method.
2. Use a Compatible Remote
Not every Genie remote works with every Genie garage door opener.
Compatibility depends on factors such as the opener generation and remote technology.
3. Watch the LED Indicators
The programming lights provide useful feedback.
On many newer Genie models, a flashing purple LED indicates that the opener is waiting for a remote signal.
On older models, the red LEARN CODE LED performs a similar role.
4. Press Buttons Slowly
Avoid repeated rapid button presses.
Give the opener time to recognize each signal.
5. Do Not Erase Memory Unnecessarily
Clearing the motor’s memory can disable other working remotes and keypads.
Only use the memory-erasing procedure when you actually need to revoke or reset wireless access.
6. Test All Connected Devices
After programming, test every device that should operate your garage door.
Check the handheld remote, wireless keypad, and compatible vehicle controls.
7. Keep Access Devices Secure
Treat your garage door remote like a house key.
Do not leave it unattended in an unlocked vehicle.
If a remote is lost or stolen, erase the opener’s stored wireless access and reprogram devices you still possess.
Frequently Asked Questions About Genie Garage Door Opener Programming
How do I program my Genie garage door opener remote?
For many newer Genie models, press and hold the PROGRAM button until the round LED turns blue. Release the button and wait for the longer LED to flash purple. Press and release the selected remote button twice, allowing the opener to recognize each press. Press it again to test the door. Older models with a LEARN CODE button use a different sequence.
Where is the learn button on a Genie garage door opener?
The LEARN CODE button on older Genie openers is usually located on the motor housing, near the antenna wire, or beneath the light lens. Newer models often have a PROGRAM or PRGM/SET button instead. Check the motor’s model label and owner’s manual to identify the correct location.
How do I program a Genie garage door opener without the old remote?
You can usually program a compatible replacement Genie remote directly through the opener’s PROGRAM or LEARN CODE button. A working old remote is not normally required for this process. However, programming a vehicle’s HomeLink system may require an existing working handheld remote or another supported training method.
Why is my Genie garage door opener remote not working?
Common causes include a dead battery, an incompatible remote, incorrect programming steps, wireless interference, or lost pairing. First, replace the remote battery and confirm that your remote supports the opener. Then repeat the correct programming procedure. If the wall console also fails, investigate the opener’s power and operating condition.
How do I reset my Genie garage door opener code?
To change a GK-R wireless keypad PIN, follow its factory reset and PIN programming instructions. To revoke all previously paired remote access, use the opener motor’s memory-clearing procedure. These are different operations. Clearing motor memory also means you must reprogram the wireless devices you still want to use.
Can I program two remotes to one Genie garage door opener?
Yes. Many Genie garage door openers support multiple compatible remotes. Put the opener into programming mode and pair each remote separately. You generally do not need to erase an existing remote to add another one. The number of supported devices can vary by opener model.
How do I program a three-button Genie remote?
Choose the button you want to assign to the garage door. Activate the opener’s programming mode, then follow the applicable pairing sequence using that chosen button. Repeat the procedure for other buttons or compatible garage door openers. Some multi-button remotes also require selecting the correct Intellicode operating mode.
Can I program my Genie garage door opener using my car?
Yes, if your car has a compatible built-in garage door control such as HomeLink or Car2U. You generally train the vehicle transmitter using a working Genie remote and then pair the vehicle button with the opener. The exact process depends on your vehicle and garage door opener model.
What does a flashing purple light mean on a Genie garage door opener?
On many newer Genie garage door openers, a flashing purple programming LED indicates that the opener is ready to receive a compatible remote or accessory signal. This normally appears after pressing and releasing the PROGRAM button when the round LED has turned blue. LED meanings may vary on other models.
Why will my Genie garage door opener not accept a new remote?
The remote may be incompatible, have a weak battery, or require a different Intellicode mode. You may also be using the wrong programming sequence or pressing the buttons too quickly. Check the exact model numbers, confirm compatibility, and follow the manufacturer’s instructions.
How long does a Genie garage door opener stay in programming mode?
The programming time depends on the opener. Many older LEARN CODE models provide a learning window of approximately 30 seconds. If the indicator times out before you finish, press and release the learning button again. Follow the owner’s manual for the exact timing of your model.
Can I program a universal remote to a Genie garage door opener?
Yes, certain universal remotes support Genie Intellicode openers. However, universal remotes often require their own manufacturer-specific programming steps. You may need to select the correct opener brand, technology, or compatibility code before using the motor’s learning button.
Do I need to reprogram my Genie remote after changing the battery?
Usually not. Compatible Genie remotes normally retain their programming when the battery is replaced. Install the correct battery and test the remote. If it still does not work, confirm the battery polarity, remote condition, and opener compatibility before trying to pair it again.
How do I know if my Genie remote is programmed successfully?
The opener’s programming indicator lights should show that pairing has been accepted. On many newer models, the LEDs flash blue and turn off after the correct remote button sequence. Press the programmed remote button from a safe location. If the garage door operates normally, programming was successful.
Can I program a Genie garage door opener from my phone?
Some Genie garage door openers support smartphone access through compatible Aladdin Connect equipment or built-in connected features. This is different from programming a handheld remote. You must follow the setup instructions for your specific connected opener or accessory, including any required app, account, and network configuration.
Final Thoughts
Learning how to program Genie garage door opener remotes and keypads can save time and make everyday garage access more convenient.
The most important step is identifying your opener’s programming system.
For newer Genie garage door openers, you will usually use the PROGRAM or PRGM/SET button and watch for the blue and purple indicator lights.
For older Intellicode models, the LEARN CODE button and red indicator LED guide the process.
You can also connect compatible wireless keypads, additional remotes, and vehicle controls by following the instructions for each accessory.
If a remote does not work after programming, check its battery and compatibility before resetting the entire system.
Finally, remember that garage door safety is more important than completing programming quickly. If the door, springs, safety sensors, or electrical components appear damaged, stop using the system and contact a qualified professional.
For model-specific instructions, consult the official Genie programming guides or your garage door opener owner’s manual.