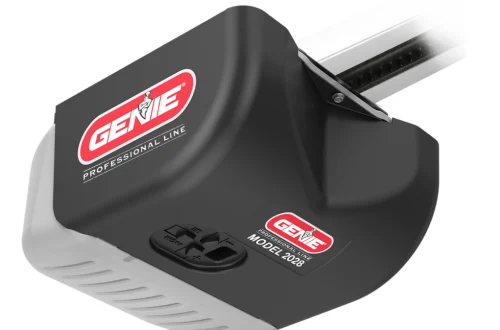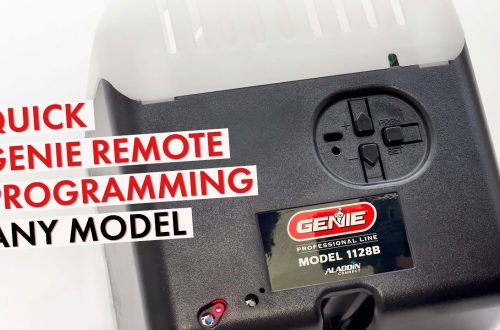


If you have recently installed a Genie 7055 garage door opener, purchased a replacement remote, or forgotten your keypad code, learning how to program it can save you time and frustration.
The Genie 7055 is a residential garage door opener associated with the StealthDrive 750 series. It uses Genie Intellicode technology for compatible remote controls and wireless keypads. The opener can also work with compatible in-vehicle controls, depending on the equipment installed.
Programming your Genie garage door opener is usually simple once you know where the programming button is located and what the indicator lights mean.
This guide explains how to program Genie 7055 garage door opener accessories, including the remote control, wireless keypad, and keypad PIN. You will also learn how to reset the keypad, connect multiple remotes, and solve common programming problems.
The steps are based on the model’s documented programming procedure. Always check the instructions supplied with your specific accessory, especially if you have a newer or universal keypad.
Quick Answer: How Do You Program a Genie 7055 Garage Door Opener?
To program a compatible remote control, locate the PRGM/SET button on the motor unit. Press and hold it for approximately two seconds until the round indicator turns blue. Release the button and look for the long indicator to flash purple.
Stand at least five feet away from the opener. Slowly press and release your chosen remote button twice. The opener’s lights should flash and turn off to confirm successful programming.
Press the same remote button a third time to test the garage door.
For a compatible original-style Genie wireless keypad, first set a three- to eight-digit PIN using the keypad’s programming instructions. Then put the opener into programming mode, enter your PIN, and slowly press the keypad’s Up/Down button until the door responds.
These are two different procedures. Programming the remote does not automatically program the keypad. Manuals++1
What Is the Genie Model 7055 Garage Door Opener?
The Genie StealthDrive 750 Model 7055 is designed to operate compatible residential sectional garage doors. It provides motorized door operation using a belt-drive mechanism.
Depending on the product package, accessories can include a handheld remote control, a wall console, a wireless keypad, and battery backup equipment.
Important Features of the Genie 7055
| Feature | Description |
|---|---|
| Product model | Genie 7055 |
| Series | StealthDrive 750 |
| Drive system | Belt drive |
| Remote technology | Genie Intellicode |
| Programming button | PRGM/SET |
| Programming indicators | Round and long LEDs |
| Wireless keypad | Compatible Genie keypad, programmed separately |
| Vehicle compatibility | Compatible HomeLink and Car2U systems |
| Safety system | Genie Safe-T-Beam |
| Battery backup | Available on supported configurations |
The Genie 7055 uses indicator lights to show whether the opener has entered programming mode and whether a remote has been accepted.
Understanding these lights makes the entire process easier.
Things to Check Before Programming the Genie 7055
Before starting, make sure the opener and accessories are ready.
Check the Power Supply
Confirm that the garage door opener is connected to a working power outlet. If the motor unit has no power, it cannot receive the programming signal from your remote.
Check whether the wall console responds normally. If the opener has battery backup, the opener may still operate during an outage, but restoring normal power is helpful when diagnosing a programming problem.
Check the Remote Battery
A weak or disconnected remote battery is a common reason for unsuccessful programming.
If you are using a new remote, look for a small protective plastic tab near its battery compartment and remove it.
If the remote is older and its indicator light does not respond, inspect or replace the battery with the correct type specified for that remote.
Identify Your Keypad Model
Not every Genie keypad uses exactly the same instructions.
The original-style wireless keypad documented with the 7055 uses a PROGRAM button and an Up/Down key. Newer Genie GK, GK2, and universal keypads may use different procedures.
Before beginning, compare your keypad’s buttons with the accessory’s instruction sheet. The Genie Company
Clear the Garage Door Area
Make sure there are no people, pets, vehicles, or objects in the garage door’s path.
A successful programming attempt may activate the motor unexpectedly. Keep the entire doorway visible and never stand underneath a moving garage door.
Do not adjust springs, cables, or other tension-loaded parts while attempting to solve programming problems.
Where Is the Learn Button on the Genie 7055?
One of the most common questions is where to find the Genie 7055 learn button.
On this model, the button used for pairing accessories is commonly labeled PRGM/SET or SET/PRGM rather than simply LEARN.
It is located on the opener’s powerhead, which is the motor unit mounted near the garage ceiling.
Look for the programming control area containing three buttons and two indicator lights.
The controls include:
- PRGM/SET: Enters programming menus and confirms settings.
- Plus (+): Adjusts door position during travel-limit setup.
- Minus (−): Adjusts door position during travel-limit setup.
- Round LED: Displays certain programming states.
- Long LED: Provides additional status information.
The PRGM/SET button is the control used to pair compatible remote controls and keypads.
Understanding the Genie 7055 Programming Lights
The blue and purple indicators are especially important when connecting accessories.
| LED indication | Meaning during accessory programming |
|---|---|
| Round LED turns solid blue | Programming mode is being activated |
| Long LED flashes purple | Opener is ready to receive a compatible remote or keypad signal |
| LEDs flash and go off | Remote pairing has been accepted |
| Programming times out | Start the pairing procedure again |
The programming window is approximately 30 seconds. If you cannot complete the procedure within that time, begin again from the PRGM/SET button.
Do not assume that every red LED pattern indicates a programming timeout. Red indicators can also be associated with other operating or diagnostic conditions.
How to Program Genie 7055 Garage Door Opener Remote?
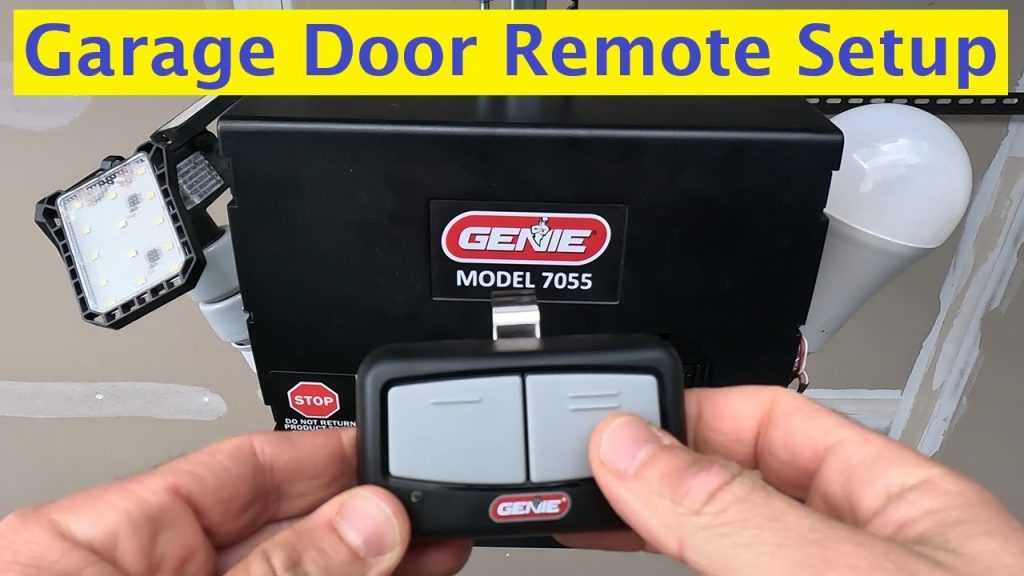
The following procedure is for a compatible Genie Intellicode remote. It is useful when you have purchased another remote, replaced a damaged controller, or need to reprogram an existing one.
Step 1: Prepare the Remote Control
Check that your Genie remote has a working battery.
Remove any protective battery tab if the remote is new. Choose the button you want to use for this garage door.
If the remote has multiple buttons, remember that each button can be programmed separately.
For example, you might use the first button for your main garage door and the second button for another compatible opener.
Step 2: Find the PRGM/SET Button
Locate the motor unit on your garage ceiling.
Find the PRGM/SET button on the programming control panel.
Use a stable ladder if necessary. Keep your body away from the moving door and its hardware, and avoid touching electrical terminals.
Step 3: Enter Programming Mode
Press and hold PRGM/SET for approximately two seconds.
The round LED should turn blue.
Release the button. The round indicator should turn off, and the long LED should begin flashing purple.
This flashing purple light means the opener is ready to receive the remote’s signal.
Step 4: Press the Remote Button Twice
Move at least five feet away from the opener.
Slowly press and release the button you selected on your remote.
Wait briefly, then press and release the same button again.
The opener’s LEDs should flash and switch off, confirming that the remote has been programmed.
Avoid rapidly tapping the button. Pressing too lightly or too quickly can prevent the opener from recognizing the programming sequence.
Step 5: Test the Genie 7055 Remote
Press the same remote button once more.
The garage door should begin moving if the opener is properly installed, the safety conditions are satisfied, and no other operating issue is present.
Watch the complete door movement to confirm that it opens and closes correctly.
If the garage door does not respond, repeat the programming procedure.
Step 6: Program Additional Remotes
If more than one family member uses the garage, you can program additional compatible remotes.
Repeat the entire procedure for each remote or individual remote button.
Do not assume that programming one remote automatically connects other remotes.
For example, if three family members each have a compatible handheld remote, each remote must be paired with the opener independently.
Important: If the garage door does not move after successful pairing, the problem may involve the travel limits, safety sensors, wall-console settings, or door mechanism rather than the remote itself.
The remote programming sequence above follows the Genie 7055 operation and maintenance instructions. Manuals+
How to Program Genie 7055 Wireless Keypad?
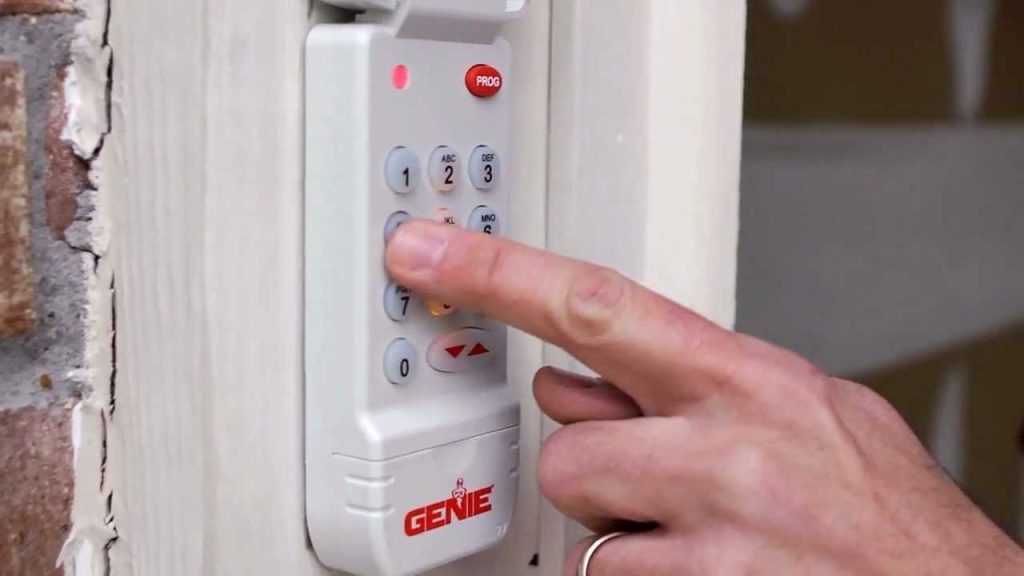
Genie 7055 programming keypad instructions are slightly different from remote programming because the wireless keypad requires a personal identification number, also called a PIN.
A keypad is useful when you want to open your garage without carrying a remote. For example, you may want to enter the garage after walking your dog, riding a bicycle, or returning home without your car.
The original-style Genie Intellicode wireless keypad documented for the 7055 allows you to create a PIN containing three to eight digits.
Before following the instructions below, confirm that your keypad has a PROGRAM key and an Up/Down key. These steps do not necessarily apply to every Genie universal keypad.
Step 1: Activate the Wireless Keypad
If your wireless keypad is new, open the battery compartment and remove the protective battery tab.
Check that the batteries are installed correctly, then close the battery cover.
Wait until the keypad backlighting turns off before starting.
Programming the keypad before attaching it to the outside garage wall is usually easier.
Step 2: Enter the Initial Programming Sequence
On an unprogrammed, original-style Genie keypad:
- Make sure the keypad backlighting is off.
- Press the numbers
3,5, and7in sequence. - Press the PROGRAM button.
- Watch for the keypad LED to begin flashing.
This sequence starts the initial PIN programming process.
Step 3: Set Your New PIN
Choose a personal identification number containing three to eight digits.
For example, you might select 482619.
Enter your preferred PIN and press PROGRAM again.
If everything works correctly, the keypad LED should flash twice and then turn off.
The PIN is now stored in the keypad.
Avoid obvious combinations such as 1234, 1111, or your street address. Select a code that you can remember but that other people cannot easily guess.
Step 4: Put the Genie 7055 Into Programming Mode
Find the PRGM/SET button on the garage door opener’s motor unit.
Press and hold it for approximately two seconds until the round LED turns blue.
Release the button.
When the long LED begins flashing purple, the opener is ready to receive the keypad signal.
You generally have about 30 seconds to complete the connection.
Step 5: Connect the Keypad to the Garage Door Opener
Return to the wireless keypad.
Make sure its backlighting has turned off, then enter the PIN you just created.
Slowly press the Up/Down button three or four times until the garage door opener responds.
The keypad and opener should now be paired.
For example, if your PIN is 482619, enter those six digits, then press the Up/Down key slowly as instructed.
Step 6: Test the Keypad
Allow the keypad backlight to turn off.
Enter your PIN and press the Up/Down button once.
The garage door should operate.
If the door responds correctly, the Genie 7055 keypad programming process is complete.
If it does not respond, try the procedure again. Confirm that the keypad’s PIN was saved successfully and that the motor unit was in programming mode before attempting to pair it.
These steps follow the original keypad programming instructions included in the Genie 7055 documentation. ismartgate
How to Change the PIN on a Genie 7055 Keypad?
Sometimes you may need to change your garage door keypad PIN without replacing the keypad.
For example, you may want to update the code after moving into a new home or after sharing your previous code with someone who no longer needs access.
If you know your existing PIN and have the original-style Genie keypad, changing it is straightforward.
Step-by-Step Instructions
- Wait for the keypad backlighting to turn off.
- Enter your current PIN.
- Press the PROGRAM button once.
- Enter a new PIN containing three to eight digits.
- Press PROGRAM once more.
Your new PIN should replace the old one.
Test the new PIN after the keypad becomes inactive. The previous PIN should no longer operate the keypad.
Example: If your old code was 2468 and you change it to 583721, you should use the new six-digit code for future access.
Changing a PIN on the keypad is not the same as clearing every paired remote from the motor unit. If someone has a missing or unauthorized remote, consider clearing the opener’s remote memory as explained later in this guide.
How to Reset Genie 7055 Keypad Without the Old PIN?
If you have forgotten your keypad PIN, the original-style keypad provides a factory-reset procedure.
This resets the keypad’s programming so that you can start with a new code.
Step 1: Locate the Keypad Buttons
Find the PROGRAM and Up/Down buttons on your keypad.
Make sure its backlighting is off.
Step 2: Reset the Keypad
Press and hold the PROGRAM and Up/Down buttons together for approximately five seconds.
Watch the LED indicator.
It should flash twice and then turn off, indicating that the reset has completed.
Step 3: Create a New PIN
Once the keypad has been reset, repeat the initial PIN setup:
- Enter
3-5-7. - Press PROGRAM.
- Enter your new three- to eight-digit PIN.
- Press PROGRAM again.
Step 4: Pair the Keypad Again
Put the opener into programming mode using PRGM/SET.
Enter your new PIN on the keypad and slowly press Up/Down until the opener responds.
Test the new code before mounting or closing the keypad’s battery compartment.
Remember that resetting the keypad and clearing the opener’s remote memory are different actions. Resetting the keypad does not automatically remove every other remote from the motor unit.
How to Program Multiple Garage Doors With One Genie Keypad?
Some homeowners have two or three garage doors and prefer using a single wireless keypad.
The original-style Genie keypad supports programming for up to three compatible Genie Intellicode openers.
However, it uses one PIN for the connected doors, rather than providing a completely separate PIN for each garage door.
Step 1: Set Up the Keypad for Multiple Doors
First, program your regular PIN using the instructions above.
After that:
- Wait until the keypad backlighting is off.
- Enter your existing PIN.
- Press PROGRAM twice.
- Enter the number of openers you want to control, either
2or3. - Press PROGRAM once.
The keypad should confirm the setting by flashing its LED twice and switching off.
Step 2: Connect the First Opener
Put the first garage door opener into programming mode.
Enter your PIN on the keypad.
Press Up/Down once, then press 1 to identify the first door.
Slowly press Up/Down three or four times until the opener responds.
Step 3: Connect the Second Opener
Repeat the process with your second garage door opener.
This time, enter the same PIN, press Up/Down, and select 2 as the door number.
Press Up/Down slowly until the opener responds.
If you have a third compatible door, repeat the process using the number 3.
Step 4: Operate the Selected Door
After programming, the normal multi-door operating sequence is:
- Enter your PIN.
- Press Up/Down.
- Press the number of the door you want to operate.
For example, entering your PIN, pressing Up/Down, and then pressing 2 should operate the second programmed door.
Keep children and other people away from all connected doors while testing. Manuals+
How to Set a Temporary PIN on a Genie 7055 Keypad?
A temporary PIN can be useful when a trusted visitor, repair technician, or neighbor needs limited garage access.
On the original-style keypad, the temporary code remains usable until the main PIN is used again.
This is not the same as a code that automatically expires after a fixed number of hours.
Steps to Create a Temporary PIN
- Enter your existing main PIN.
- Press PROGRAM three times.
- Enter a temporary PIN containing three to eight digits.
- Press PROGRAM once.
You can now give the temporary code to the person who needs access.
The original keypad instructions specify that using the regular PIN again removes the temporary PIN.
For greater security, do not share your primary garage code when temporary access will work.
If your keypad is a GK, GK2, or universal model, check its particular instructions before attempting this feature.
How to Erase Genie 7055 Remote Memory?
If a remote control has been lost or stolen, simply programming a replacement may not be enough.
The missing remote may still be paired with the opener.
To prevent an old remote from operating your garage door, you can clear the opener’s stored remote memory.
Warning: This procedure removes all programmed handheld remotes, wireless keypads, and vehicle transmitters from the opener’s memory. You will need to program the devices you still want to use again.
Step 1: Enter Programming Mode
Press and hold the PRGM/SET button for approximately two seconds.
Release it when the appropriate programming indicator appears and the opener enters programming mode.
Step 2: Press the Plus and Minus Buttons
Press and hold the Plus (+) and Minus (−) buttons at the same time.
Continue holding them until both indicator LEDs go off.
This erases the stored remote-device programming.
Step 3: Verify the Memory Has Been Cleared
Press the button on a previously programmed remote.
The garage door should no longer respond to that remote.
Step 4: Reprogram Your Authorized Devices
Use the programming instructions earlier in this article to reconnect the remotes and keypads you still own.
Do not forget compatible vehicle controls that were previously paired with the motor unit.
The wired wall console should continue functioning normally after remote memory is cleared. The Genie Company
How to Program Genie 7055 Garage Door Travel Limits?
Programming a remote or keypad is different from setting the garage door’s travel limits.
Travel limits determine the positions where the opener stops when opening or closing the garage door.
You may need to check these settings during a new installation or after an authorized repair.
However, if your existing garage door already opens and closes correctly, there is usually no reason to change its travel limits just to add a new remote.
Before Adjusting Travel Limits
The garage door must be correctly installed, balanced, and mechanically sound.
The opener’s carriage must be engaged properly. The original Genie manual also instructs users to use AC power rather than battery-backup operation while setting travel limits.
If the door is difficult to move manually, has damaged cables, or appears unbalanced, stop and contact a qualified garage door technician.
Programming the Down Travel Limit
The general Genie 7055 procedure involves entering the down-limit programming mode with the Down (−) button.
Once the appropriate blue indicator appears, the door position can be adjusted using the directional controls.
Position the garage door so that it closes against the floor without excessively compressing the weather seal.
Press and release PRGM/SET to save the setting.
Programming the Up Travel Limit
For the opening position, use the Up (+) button to enter the corresponding programming mode.
Adjust the door until it reaches the correct fully open position.
Avoid setting it so far that it strains the door, track hardware, or spring cables.
Press and release PRGM/SET to store the upper limit.
Perform the Required Safety Tests
Setting travel limits does not complete the entire installation procedure.
The opener also requires proper force-control operation and contact-reversal testing.
Follow the precise sequence in the manufacturer’s manual, including the contact-reverse test using a 1½-inch-high object or a 2-by-4 laid flat on the floor, as instructed.
If the door does not reverse correctly, do not continue using the automatic opener.
Refer to the Genie installation and travel-limit programming videos for the proper demonstration. Model 2055, 3035, 3055, 7055
Genie 7055 Programming Troubleshooting: Common Problems and Solutions
Sometimes a Genie 7055 remote or keypad will not work even after you follow the programming instructions carefully.
The table below shows common symptoms, possible causes, and practical checks.
| Problem | Possible cause | What to do |
|---|---|---|
| Remote does not respond | Weak battery or unsuccessful pairing | Check battery and reprogram |
| Keypad lights do not turn on | Dead or incorrectly installed batteries | Check battery type and polarity |
| Purple LED stops flashing | Programming window expired | Restart programming |
| Keypad accepts PIN but door does not move | Keypad not paired with opener | Repeat the pairing process |
| Remote works only near the garage | Weak battery or interference | Replace battery and check for interference |
| Wall button works, remote does not | Remote issue, lock feature, or pairing | Check wall-console settings and remote |
| Door starts closing and reverses | Safety sensor or obstruction issue | Inspect the door path and sensor indicators |
| Door stops before fully opening | Travel-limit or mechanical problem | Consult the manual or a qualified technician |
Problem 1: Genie 7055 Remote Not Programming
If your remote is not pairing, check the following:
First, confirm that the remote is compatible with the Genie 7055 and its Intellicode system.
Second, verify that the opener enters the correct programming mode. The long purple indicator should flash during the remote pairing procedure.
Third, stand at least five feet away from the motor unit before transmitting the programming signal.
Finally, press the selected remote button slowly rather than rapidly.
If the opener’s programming indicators do not confirm pairing, repeat the process from the beginning.
Problem 2: Genie 7055 Keypad Not Working After Programming
A keypad can accept a PIN internally without being connected to the garage door opener.
This means successfully creating a PIN is only part of the procedure.
After setting the PIN, you must place the opener into programming mode and synchronize the keypad.
If the keypad still does not work, inspect the batteries and verify that you are following the instructions for your exact keypad model.
Resetting the keypad and repeating the procedure can help when the initial setup has failed.
Problem 3: Genie 7055 Learn Button Not Working
If pressing PRGM/SET produces no expected indicator response, confirm that the opener has power.
Check the control area for visible damage, but do not open the motor housing or touch internal electrical parts.
A damaged control board, faulty button, or other electrical problem may require professional service.
Avoid repeatedly pressing random button combinations, especially when you are unsure whether the opener is in remote, travel-limit, or another programming mode.
Problem 4: The Garage Door Opens but Will Not Close
A door that opens but refuses to close may have a safety-system problem.
Check that the doorway is clear and inspect the Safe-T-Beam photo-eye sensors near the lower sides of the opening.
Look for an obstruction, dirt, or an obvious sensor alignment problem.
Do not bypass, disconnect, or disable the safety sensors to make the opener work.
If the issue continues, follow Genie’s diagnostic instructions or contact a qualified service technician.
Problem 5: Remote Works Only at Short Range
Poor remote range does not always mean the opener needs to be programmed again.
Check the remote battery first.
Then inspect whether the opener’s antenna wire is positioned according to the installation instructions.
Nearby electronics, metal obstructions, and certain LED lighting products can sometimes create radio interference.
Try testing the remote with suspected interference sources turned off where it is safe and practical to do so.
Never cut, extend, or alter the opener’s antenna without manufacturer guidance.
How to Program Genie 7055 With HomeLink?
HomeLink is an in-vehicle control system that can operate compatible garage door openers.
The Genie 7055 supports compatible HomeLink systems, but the exact steps depend on the vehicle and the HomeLink generation installed.
Some systems require you to train the vehicle button using a compatible handheld Genie remote before linking HomeLink to the opener.
General Programming Process
- Park your vehicle safely outside the garage, away from the moving door.
- Check the vehicle owner’s manual for its HomeLink programming instructions.
- Select the HomeLink button you want to use.
- If instructed, train the HomeLink button using your working Genie remote.
- Put the Genie 7055 into programming mode using PRGM/SET.
- Complete the vehicle-side pairing sequence specified by HomeLink.
- Test the programmed button while keeping the garage door in clear view.
Avoid clearing all HomeLink memory unless necessary, because doing so may remove other programmed devices.
Vehicle manufacturers can use different HomeLink versions, so refer to both your vehicle instructions and Genie’s model-specific guidance rather than assuming every vehicle uses the same button sequence.
For additional help, visit the Genie 7055 support resources.
How to Replace Genie Wireless Keypad Batteries?
If your keypad works intermittently, displays weak lighting, or stops responding to button presses, its batteries may need replacement.
The original-style wireless keypad documented in the 7055 manual uses AAA alkaline batteries.
Other keypad models may have different battery requirements.
Step-by-Step Battery Replacement
- Open the keypad battery compartment.
- Remove the existing batteries.
- Check the battery compartment for corrosion or damage.
- Install replacement batteries of the correct type.
- Follow the positive and negative polarity markings.
- Close the battery compartment.
- Enter your PIN and test the keypad.
The original keypad manual states that replacing the batteries does not erase the stored programming.
Therefore, you normally do not need to pair the keypad again after a routine battery replacement.
If the keypad still fails after new batteries are installed, inspect the keypad contacts and consider resetting or replacing the accessory.
Important Genie 7055 Safety and Maintenance Tips
Regular checks can help keep your opener working reliably.
Keep the Sensors Clean
Check the photo-eye sensors regularly.
Make sure nothing blocks the invisible beam between them. Remove dirt carefully without damaging the sensor lenses or wiring.
Test Door Reversal
Follow Genie’s recommended safety-test procedure.
The garage door should reverse when it contacts the test obstruction specified in the manufacturer’s instructions.
If the safety reversal system fails, stop using the automatic opener until the problem is corrected.
Inspect Remote and Keypad Batteries
Replace batteries when accessories become unreliable.
Do not wait until every remote stops functioning, particularly if your household relies on the garage as a primary entrance.
Protect Your Keypad Code
Choose a PIN that is difficult for unauthorized visitors to guess.
Update your code when access needs change, and avoid writing the PIN directly on the keypad or garage wall.
Keep Remote Controls Secure
Do not leave an unsecured remote inside a vehicle parked outside your home.
If a remote is lost, erase the opener’s remote memory and reconnect only the authorized devices.
Schedule Professional Service When Needed
A garage door system contains heavy moving components and parts under significant tension.
Broken springs, frayed cables, damaged tracks, severe door imbalance, and unexpected door movement should be handled by qualified professionals.
Programming a remote control cannot correct these mechanical problems.
Genie 7055 Programming: Frequently Asked Questions
How do I program my Genie 7055 garage door opener?
To program a compatible remote, press and hold the PRGM/SET button on the motor unit for approximately two seconds. Release it when the blue indicator appears and the long LED begins flashing purple. Stand at least five feet away, then slowly press the chosen remote button twice. Press it a third time to test the door. Wireless keypads require a separate PIN setup and pairing procedure.
Where is the learn button on the Genie 7055?
The Genie 7055 uses a programming button labeled PRGM/SET or SET/PRGM on the motor unit. It is located in the opener’s programming control area alongside the Plus and Minus buttons and LED indicators. This button performs the learning function used to connect compatible remote controls and keypads. Check the opener’s manual if your control layout looks different.
How do I program a Genie 7055 keypad?
For the original-style keypad, begin with the backlighting off. Enter 3-5-7, press PROGRAM, enter a new three- to eight-digit PIN, and press PROGRAM again. Next, place the motor unit into programming mode, enter the PIN, and slowly press the keypad’s Up/Down button until the garage door responds. Newer Genie keypad models may have different instructions.
How do I reset the Genie 7055 wireless keypad?
For the original-style keypad, wait until the backlighting is off, then press and hold PROGRAM and Up/Down together for approximately five seconds. After the LED flashes twice and turns off, create a new PIN using the initial programming sequence. Pair the keypad with the motor unit again if necessary. This resets the keypad, not every remote stored in the opener.
Why is my Genie 7055 remote not programming?
A remote may fail to program because of a weak battery, incompatible remote model, expired programming window, or incorrectly timed button presses. Make sure the opener’s long LED is flashing purple before attempting pairing. Stand at least five feet away and press the remote button slowly. If the opener still does not recognize the remote, consult the compatibility information and manufacturer troubleshooting instructions.
What does the flashing purple light mean on a Genie garage door opener?
During remote and keypad programming, the long purple flashing indicator generally means that the Genie 7055 is ready to receive a compatible accessory’s programming signal. The opener allows a limited time to complete the pairing procedure. If that period expires, restart programming. Different LED patterns outside pairing mode can have other meanings, so check the diagnostic section of the manual.
Can I program two remotes to one Genie 7055?
Yes. You can program multiple compatible remotes to the same Genie 7055 opener. Each remote must be paired separately using the PRGM/SET button. If a remote has multiple buttons, each button can also be programmed individually. This makes it convenient for different household members to operate the garage. Keep the remote controls secure to prevent unauthorized access.
How do I change the PIN on my Genie 7055 keypad?
For the original-style Genie keypad, enter your current PIN, press PROGRAM once, type your new three- to eight-digit PIN, and press PROGRAM again. The new code replaces the previous PIN. Test it after the keypad becomes inactive. If you cannot remember the existing PIN, use the keypad reset procedure instead, then complete the initial programming steps.
Can I program the Genie 7055 without a remote?
Yes, you can program a compatible wireless keypad without using a handheld remote. The keypad must first be configured with a PIN and then paired directly with the opener using the PRGM/SET button. Compatible HomeLink setups may require an existing remote for their initial training procedure, depending on the vehicle system. Consult the accessory instructions for the method that applies.
How do I erase all remotes from Genie 7055 memory?
Enter programming mode using the PRGM/SET button, then press and hold the Plus and Minus buttons together until the opener’s LEDs turn off. This clears stored remote-device programming, including paired handheld remotes, wireless keypads, and compatible vehicle transmitters. You must then reconnect the devices you want to keep using. This procedure is especially useful after losing a remote.
Does changing the Genie 7055 keypad battery erase the code?
The original-style Genie wireless keypad retains its programming during a normal battery replacement. After installing correctly sized replacement batteries, the stored PIN should continue working. If it does not, check battery polarity, inspect the contacts, and confirm the keypad is functioning. Other Genie keypad models may use different batteries, so always follow the instructions for your particular accessory.
Can I connect the Genie 7055 garage door opener to my smartphone?
The Genie 7055 can support smartphone operation through compatible additional Genie smart technology, such as an appropriate Aladdin Connect setup. However, smartphone connectivity is separate from ordinary Intellicode remote and keypad programming. Availability and installation requirements depend on your exact opener configuration and accessory. Check the official Genie 7055 support page for compatible smart-control equipment and setup instructions.
Final Thoughts
Learning how to program Genie 7055 garage door opener accessories is easier when you understand the difference between remote pairing, keypad PIN setup, and opener memory management.
For handheld remotes, the main process involves entering programming mode with PRGM/SET and transmitting the remote signal.
For original-style wireless keypads, you must first create a PIN and then connect the keypad to the opener.
If a remote is lost, clearing stored remote memory provides a way to remove access from previously programmed devices.
Always follow the correct instructions for your specific remote or keypad model. Keep the door area clear, test the system after programming, and never ignore a malfunctioning safety sensor or reversal system.
With these steps, you can manage your Genie 7055 remote controls and keypad while keeping your garage access convenient and secure.