

Programming your Genie 4062 garage door opener can be simple when you know the correct steps. Whether you have purchased a new remote, replaced an old keypad, moved into a new house, or lost your remote control, you can usually program your opener without hiring a technician.
The Genie 4062 is available in product versions including the Excelerator II and MachForce. It uses Genie’s Intellicode technology with compatible remote accessories. The opener’s programming controls help you connect remotes, synchronize wireless keypads, and configure travel limits.
However, different programming tasks require different steps. Connecting a handheld remote is not the same as changing the wireless keypad PIN or resetting the garage door travel limits.
In this guide, you will learn how to program Genie 4062 garage door opener accessories, identify the programming button, erase remote codes, set the door’s travel limits, and troubleshoot common problems.
How to Program Genie 4062 Garage Door Opener: Quick Steps

According to the Genie 4062 programming manual, the opener lights flash and turn off when the remote has been successfully learned. Each programming step has a 30-second time limit.
What Is the Genie 4062 Garage Door Opener?
The Genie 4062 is a residential garage door opener model offered in different product configurations. These openers are designed to automate compatible overhead garage doors.
Important features and functions include:
- Intellicode technology: Uses changing access codes to improve remote-control security.
- Wireless remote compatibility: Allows compatible handheld transmitters to operate the garage door.
- Optional wireless keypad: Provides outdoor access using a personal identification number.
- HomeLink and Car2U support: Allows programming of compatible built-in vehicle controls.
- Safe-T-Beam system: Uses safety sensors to help prevent the garage door from closing on an obstruction.
- Programmable travel limits: Allows the opener to learn the correct fully open and fully closed positions.
Not every Genie 4062 installation includes the same accessories. Before following any programming instructions, check the model label and the accessory model number.
What You Need Before Genie 4062 Programming?
You do not usually need special tools to program the remote or keypad. However, a few preparations can prevent programming failures.
1. A compatible Genie remote or keypad
Make sure your remote control works with the Genie 4062 opener and its Intellicode receiver. Check the product documentation rather than assuming every Genie-branded or universal remote will work.
2. A working remote battery
Inspect the remote before programming. If it is new, remove the protective battery tab. If the remote has been used for several years, check whether its indicator light activates when you press a button.
A weak battery can interrupt programming or reduce the operating range.
3. Access to the motor unit
The programming buttons are located on the garage door opener’s powerhead, which is normally mounted to the garage ceiling.
Use a stable stepladder positioned on a level surface. Never stand on a chair or the garage door itself to reach the unit.
4. A clear garage door opening
Remove vehicles, tools, boxes, and other objects from the garage door’s travel path. Keep children and pets away while testing the system.
5. Working safety sensors
Check that the Safe-T-Beam sensors are installed and functioning. Do not disconnect, bypass, or modify the safety system to make the opener work.
If the garage door has damaged springs, loose cables, crooked tracks, or unusually heavy movement, stop and contact a qualified garage door technician before programming travel limits.
Where Is the Program Button on Genie 4062?
Finding the programming button is one of the most important parts of the Genie 4062 programming process.
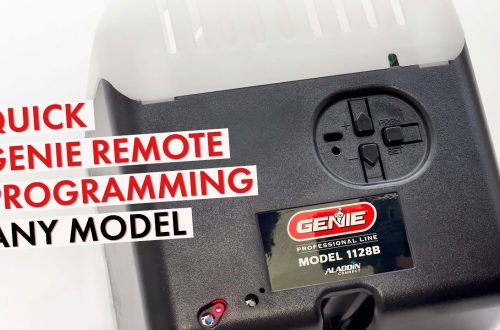
Look at the underside of the opener’s motor housing, where you should find a small group of programming controls. On versions using the standard 4062 control arrangement, the panel includes a square PRGM/SET button, an up arrow (+), a down arrow (−), and two LED indicators.
The PRGM/SET button is used to enter programming mode and save certain settings.
The arrow buttons are used primarily for garage door travel-limit adjustments and particular memory-clearing procedures.
Genie 4062 programming light meanings
| LED indication | Meaning during programming |
|---|---|
| Round LED steady blue | Programming mode has been initiated |
| Long LED flashing purple | Opener is ready to learn a compatible transmitter |
| LEDs flash and switch off | Remote-learning confirmation |
| Both LEDs red after timeout | Programming step has expired; restart |
| Long LED blue during travel setup | Travel-limit programming is active |
These descriptions refer to specific programming sequences. The same lights can indicate different conditions during regular operation or troubleshooting.
Do not interpret every red or purple light as a programming problem without checking the corresponding operating state.
How to Program a Genie 4062 Remote Control: Step-by-Step Instructions
This method is for adding or reprogramming a compatible handheld remote.
Step 1: Check the Genie remote control
Inspect the remote for damage and confirm that the battery is installed properly.
If you are using a new remote, remove the protective strip from the battery compartment. If there is no indicator light when you press the button, inspect the battery according to the remote’s instructions.
Choose the button you want to use for your garage door.
For example, if you have a three-button Genie remote, you might choose the first button for your main garage door and save the other two buttons for additional compatible openers.
Step 2: Find the PRGM/SET button
Use a stepladder to reach the garage door opener motor unit safely.
Locate the programming controls, including the square PRGM/SET button.
Make sure you are not pressing the up or down arrow by mistake. These buttons perform different functions and may be used for travel-limit programming.
Step 3: Activate programming mode
Press and hold the PRGM/SET button for approximately two seconds.
Watch the round indicator light.
When it turns solid blue, release the button. The round light should go off, and the long LED should begin flashing purple.
This indicates that the opener is ready to receive the remote-control signal.
If you do not see the expected light sequence, check your particular model’s programming manual before continuing.
Step 4: Press the remote button twice
Stand at least five feet away from the powerhead.
Slowly press and release the remote button you selected. Then press and release it a second time.
Do not hold the button continuously. The opener must detect the individual button presses.
When the programming succeeds, the LED indicators on the motor unit should flash and then go off.
If this does not happen, repeat the sequence before the programming window expires, using deliberate button presses.
Step 5: Test the newly programmed remote
Press and release the same remote button a third time.
The garage door should start opening or closing.
Observe the entire movement. The garage door should move normally and stop at the appropriate travel limit.
If the opener responds but the garage door does not move, inspect the door system and opener diagnostics rather than repeatedly pairing the remote.
Step 6: Test the remote from a normal operating location
After confirming the remote works near the opener, test it from the location where you normally use it, such as your driveway.
If it works only at a short distance, check the remote battery, antenna position, and possible radio interference.
You have now completed the Genie 4062 remote programming process.
How to Program Multiple Remotes to Genie 4062
You can program separate compatible remotes for different household members.
For example, one remote can be kept in your car, another in a family member’s car, and a third in a secure location.
To add another remote, repeat the normal programming process for that device:
- Enter programming mode using PRGM/SET.
- Wait for the long purple LED to flash.
- Press and release the chosen remote button twice, slowly.
- Wait for the confirmation lights.
- Press the button again to test the door.
Each remote button needs to be programmed separately.
Important: Adding a new remote does not normally require clearing the previously saved remotes. Do not erase the opener’s memory unless you specifically want to revoke all existing remote and keypad access.
If you use a multi-button remote with multiple compatible garage door openers, pair each chosen button with its intended opener individually.
How to Program a Genie 4062 Wireless Keypad?
A wireless keypad allows you to open your garage door without carrying a remote. It is particularly useful when walking, cycling, or working outside.
The Genie 4062 supports compatible wireless keypads, but the exact procedure can differ between older and newer keypad models.
The following instructions cover the keypad style documented in the model 4062 operation manual, which has a PROGRAM key and an Up/Down key.
Step 1: Prepare the wireless keypad
Check the keypad battery and remove any protective battery tab.
If the keypad is new, it is easier to program it before attaching it to the outside garage wall.
Wait until the keypad lights are off before beginning.
Step 2: Create your keypad PIN
For the documented Genie keypad style:
- Press 3, 5, 7 in that order.
- Press the PROGRAM button.
- Enter your preferred PIN containing 3–8 digits.
- Press PROGRAM again.
- Watch for the keypad indicator to blink and switch off.
Your new PIN is now stored in the keypad, but the keypad still needs to be connected to the opener.
Choose a PIN that is difficult for other people to guess. Avoid using obvious combinations such as 1234 or your house number.
Step 3: Put the Genie 4062 into programming mode
Go to the garage door opener motor unit.
Press and hold the PRGM/SET button for about two seconds until the round LED turns blue, then release it.
The long LED should flash purple.
You can now continue to the keypad.
Step 4: Connect the keypad to the opener
Enter your new PIN on the keypad.
Press the Up/Down key once. The opener indicators should remain steady.
Press Up/Down again. The indicators should go off.
Press Up/Down a third time. The garage door should operate, confirming that the pairing has succeeded.
Some newer Genie keypad versions instruct users to press Up/Down three or four times slowly until the door moves. Follow the instructions for your keypad model if the indicator sequence differs.
Step 5: Test the wireless keypad
Allow the keypad to return to its normal inactive state.
Enter your PIN and press the Up/Down key. The garage door should respond.
Test the keypad again after the door has completed its movement. This confirms that the keypad works in normal use rather than only during the initial programming sequence.
Once everything works, you can mount the keypad outside the garage. Install it within sight of the garage door, at least five feet above the floor, and away from moving door parts.
How to Change the Genie 4062 Keypad PIN
Changing your PIN is a good idea if you have shared it with someone who no longer needs access.
For the older Genie keypad procedure described above:
- Enter your current PIN.
- Press PROGRAM once.
- Enter a new 3–8-digit PIN.
- Press PROGRAM again.
- Test the keypad using the new PIN.
With this keypad type, changing an existing PIN does not normally require pairing the keypad with the garage door opener again.
However, resetting a keypad to factory settings is different from changing its PIN. After a full reset, you may need to create a new PIN and reconnect the keypad.
What if you forget your keypad PIN?
For the keypad covered by the original 4062 manual, hold the PROGRAM and Up/Down keys together for approximately five seconds until the keypad LEDs blink and then turn off.
After the reset, create a new PIN and repeat the opener synchronization process.
Other keypad versions can have different reset procedures. Always confirm the model printed on your keypad before resetting it.
How to Program the Genie 4062 to a Car Using HomeLink?
HomeLink is a built-in wireless control system available in many vehicles. It allows compatible garage doors to be operated using buttons inside the car.
The Genie 4062 supports HomeLink, although the steps can vary depending on vehicle model, HomeLink generation, and remote transmitter version.
Step 1: Prepare your vehicle
Park outside the garage with the engine off, where appropriate for your vehicle.
Make sure the garage door opening is clear.
Keep your working Genie remote nearby. Consult your vehicle owner’s manual if HomeLink requires the ignition or accessory power to be on.
Step 2: Choose a HomeLink button
Locate the HomeLink buttons in your vehicle. They may be on the overhead console, sun visor, or rearview mirror.
Choose the button you want to use for the garage door opener.
If the button was previously programmed, follow the vehicle’s instructions for clearing or replacing that individual setting.
Avoid clearing all HomeLink settings unnecessarily because doing so may remove other garage door or gate programming.
Step 3: Train HomeLink using the Genie remote
Hold the working Genie remote approximately two inches from the chosen HomeLink control.
Follow the vehicle’s training instructions. On many systems, you press and hold the desired HomeLink button and the Genie remote button while watching for the HomeLink indicator to change its flashing pattern.
Once the indicator confirms successful training, release the buttons.
Step 4: Complete the opener pairing when required
Many rolling-code HomeLink systems require an additional learning step at the garage door opener.
Press the Genie 4062 PRGM/SET button until the appropriate programming indication appears.
Return to your car and follow its HomeLink instructions, pressing the chosen vehicle button as directed until the opener recognizes it.
Some vehicle systems require multiple button presses.
Step 5: Test the connection
Press the newly programmed HomeLink button.
The garage door should open or close normally.
If it does not work, check the HomeLink compatibility information for your vehicle and Genie transmitter.
For detailed vehicle-specific information, use the official Genie HomeLink Programming Guide.
How to Reset Genie 4062 Remote Codes
Sometimes, programming a new remote is not enough. You may need to remove the opener’s previously stored transmitter codes.
For example, you may want to erase the remote-control memory when:
- You have lost a garage door remote.
- You recently moved into a house and do not know who has access.
- A previous resident still has a working remote.
- You want to remove all old wireless keypads and start again.
- You are replacing several remotes and want a fresh access setup.
Step-by-step: Erase all remote and keypad memory
For the Genie 4062 control arrangement described in the operation manual:
- Find the PRGM/SET button on the opener motor unit.
- Press and hold it for approximately two seconds until the round LED turns blue.
- Release the button. The round LED should turn off and the long LED should flash purple.
- Press and hold the UP (+) and DOWN (−) buttons at the same time.
- Continue holding until both LEDs flash blue and go off.
- Release the buttons.
- Press a previously programmed remote button to verify that the door no longer responds.
This clears the opener’s stored remote and wireless keypad registrations. It does not normally prevent the wired wall console from operating the garage door.
Warning: This is a full memory erase, not an individual remote deletion. You will need to pair all the remotes and wireless keypads you still want to use.
What should you do after resetting the opener?
Collect the compatible remotes that should continue working and program them one at a time.
Next, reconnect the wireless keypad and verify that the correct PIN operates the opener.
Finally, test your vehicle’s HomeLink system. If it no longer controls the door, complete its pairing process again.
How to Adjust the Genie 4062 Garage Door Travel Limits?
Travel limits tell your opener where the garage door should stop when fully opened or fully closed.
This is different from remote programming. You generally adjust travel limits only during installation or when the door no longer reaches its correct stopping positions.
For example, a door that stops several inches above the floor may need an inspection and, if appropriate, a closing-limit adjustment.
The standard 4062 manual describes separate procedures for DOWN and UP limits.
How to set the down travel limit?
Before beginning, confirm that the opener carriage is engaged, safety sensors are functioning, and the door moves correctly.
- Locate the DOWN (−) arrow on the motor unit.
- Press and hold the DOWN button for approximately two seconds until the long LED turns blue.
- Release the button and confirm that the long LED starts flashing blue.
- Press and hold the DOWN arrow to move the door toward the closed position.
- Release the button when the door has fully closed against the floor.
- Use the UP arrow for small corrections if needed.
- Press and release PRGM/SET to save the closed position.
Both LEDs should flash blue and then go off, indicating that the setting has been saved.
The door should close firmly against the floor without excessive pressure.
Never adjust the closing limit to force a damaged, binding, or unbalanced garage door into position.
How to set the up travel limit?
- Locate the UP (+) arrow.
- Hold the UP button for approximately two seconds until the long LED turns blue.
- Release the button. The round LED should begin flashing blue.
- Hold UP to move the garage door toward the fully open position.
- Release the button when the door reaches the correct open position.
- Use the DOWN arrow if a small correction is needed.
- Stop the carriage short of the opener powerhead.
- Press and release PRGM/SET to save the open position.
Check that the emergency release cord has sufficient clearance and that the door does not strike the powerhead or other hardware.
Complete the force-learning cycle
After both travel limits have been set, operate the door using the wall console.
Allow it to complete a full movement to the closed position and then a full movement back to the open position.
The opener uses this cycle to establish its normal operating force settings.
Do not increase force settings to compensate for a damaged spring, misaligned track, or other mechanical problem.
Perform the garage door safety reversal test
This test is essential after adjusting travel limits.
- Open the garage door fully.
- Place a standard 2×4 wooden board flat on the floor in the center of the door opening.
- Use the wall console to close the door.
- Observe whether the garage door stops and reverses after contacting the board.
- Remove the board after a successful test.
The Genie manual specifies that the door should reverse within two seconds of contacting the board.
If the door does not reverse correctly, stop using the automatic closer and follow the manufacturer’s adjustment guidance or contact a trained technician. Do not bypass the safety system or compensate by increasing the closing force.
Genie 4062 Programming Not Working? Common Problems and Solutions
Even when you follow the instructions correctly, a Genie 4062 may fail to recognize a remote or keypad.
The problem is not always related to programming. A weak battery, incompatible remote, locked wall console, or safety sensor issue can also prevent normal operation.
Genie 4062 troubleshooting chart
| Problem | Possible cause | Recommended solution |
|---|---|---|
| Remote does not respond | Dead battery or incomplete pairing | Check the battery and repeat remote programming |
| Blue LED appears, but pairing fails | Incorrect sequence or timeout | Release PRGM/SET at the correct time and retry |
| Purple light flashes continuously during pairing | Opener is waiting for a signal | Press the compatible remote button slowly |
| Remote works only near the opener | Battery weakness or interference | Replace the battery and inspect the antenna |
| Keypad accepts PIN but door does not move | Keypad not synchronized | Repeat keypad-to-opener programming |
| Remote works but door will not close | Safety sensor or door problem | Inspect Safe-T-Beam indicators and door path |
| Door stops before closing completely | Incorrect travel limit or mechanical resistance | Inspect the door and verify limit settings |
| Wired wall console works but remote does not | Remote programming or lock setting | Check remote pairing and Sure-Lock |
| Remote stopped working after memory reset | Stored code was erased | Program the remote again |
These are starting points for diagnosis, not definitive diagnoses. Genie publishes additional LED error codes and troubleshooting procedures in its operation manual.
Why is my Genie 4062 remote not programming?
First, check that your remote is compatible with the opener.
Next, replace the battery if necessary. Stand at least five feet from the motor unit and try the pairing sequence again.
Remember that the remote button should be pressed and released slowly rather than held continuously.
If programming repeatedly fails, check whether the motor unit responds to other working remotes. If no compatible remote can be paired, consult the opener’s diagnostic indicators and Genie technical support.
Why does the Genie 4062 have a flashing purple light?
During normal remote programming, a flashing long purple LED indicates that the opener is ready to learn the remote-control signal.
However, purple LED patterns outside the normal learning sequence can have different meanings.
For example, the manual distinguishes a long LED flashing purple during programming from both LEDs flashing purple as a possible receiver error.
Check which indicator is flashing and what the opener was doing when the light appeared.
Why does the Genie 4062 remote work but the door not close?
A successful remote signal does not guarantee that the garage door can move safely.
The Safe-T-Beam system can prevent closing when the safety beam is interrupted or the sensors are misaligned.
Check whether anything is blocking the sensors. Inspect the sensor indicator lights according to the manual.
Do not bypass the safety sensors. If the problem continues, have the door inspected.
What is the Genie 4062 Sure-Lock feature?
Some Genie wall consoles have a Sure-Lock feature that restricts opener activation while enabled.
If the garage door suddenly stops responding to wireless remotes, check the Sure-Lock switch and its indicator.
For the wall-console arrangement described in the 4062 manual, sliding the switch down turns Sure-Lock off. Confirm the labeling on your particular wall console before changing the setting.
If the lock is off and the opener still does not respond, continue with normal remote troubleshooting.
Tips for Successful Genie 4062 Programming
The following habits can make garage door opener programming easier and help prevent unnecessary resets.
Use the correct manual for your version
The model number 4062 appears in different Genie product lines. Although core procedures are similar, accessory compatibility and individual instructions can vary.
Check the opener’s model label before downloading manuals or replacing equipment.
Program one accessory at a time
Complete programming and testing for the first remote before adding another.
This makes it easier to identify a faulty battery, incompatible transmitter, or incorrectly completed sequence.
Avoid radio interference
If the remote operates inconsistently, check for common interference sources such as certain LED bulbs, nearby electronics, or problems with the opener antenna.
Do not modify the receiver or antenna circuitry. Follow Genie’s troubleshooting guidance.
Keep track of who has access
When a household member no longer needs garage access, review your remote-control security.
If a transmitter is lost or access cannot be accounted for, erase the opener’s remote memory and register the approved devices again.
Test the door regularly
Programming is only one part of safe garage door operation.
Inspect the safety sensor indicators, test the door’s reversal system according to the owner’s manual, and watch for unusual movement or sounds.
If the door is difficult to move, crooked, or has damaged hardware, contact a trained garage door technician. Never attempt to adjust high-tension springs or cables yourself.
Frequently Asked Questions About Genie 4062 Programming
How do I program a Genie 4062 garage door opener?
Press and hold the PRGM/SET button on the opener for approximately two seconds until the round LED turns blue. Release the button and wait for the long purple LED to flash. Stand at least five feet away and slowly press the remote button twice. The LEDs should flash and go off. Press the remote button a third time to test the garage door.
Where is the Learn button on the Genie 4062?
The Genie 4062 uses a PRGM/SET programming button located on the opener’s motor unit. It is normally accessible from the underside of the powerhead near the arrow controls and LED indicators. The button serves the learning function used when pairing compatible remotes and keypads.
How do I reset my Genie 4062 garage door opener remote?
To erase the opener’s remote memory, enter programming mode using PRGM/SET and then hold the UP and DOWN buttons together until the LEDs flash blue and go off. This deletes all registered remotes and wireless keypads, not just one transmitter. Afterward, reprogram every device you want to keep using.
Why is my Genie 4062 remote not working after changing the battery?
The replacement battery may be installed incorrectly, the remote contacts may be damaged, or the remote may need to be paired again. Check the battery orientation and whether its indicator activates. Try the standard Genie 4062 programming steps. Also check the wall console’s lock feature and the opener’s diagnostic indicators.
Can I program a Genie 4062 without the original remote?
Yes. You can program a compatible replacement remote using the PRGM/SET button on the opener motor unit. You do not normally need the original remote. If the original remote was lost, clear the opener’s stored remote memory first to prevent the missing remote from continuing to operate the door.
How do I program a Genie 4062 wireless keypad?
For the documented Genie keypad type, press 3-5-7, press PROGRAM, enter a new 3–8-digit PIN, and press PROGRAM again. Enter programming mode on the opener. Type the PIN on the keypad and press the Up/Down key as directed until the opener responds. Newer keypad versions may use slightly different steps.
What does a blinking purple light mean on Genie 4062?
When the long LED blinks purple immediately after you enter programming mode, the opener is ready to learn a remote or keypad signal. Other combinations of purple LEDs can indicate errors. Consult the model’s diagnostic chart if the purple light appears during normal operation.
Can I program two remotes to one Genie 4062 opener?
Yes. You can pair multiple compatible remote controls with the Genie 4062. Enter programming mode and complete the pairing procedure for each remote separately. Normally, adding another remote does not erase an existing working remote.
How do I program Genie 4062 HomeLink?
Train your vehicle’s HomeLink button using a compatible working Genie remote, following the vehicle manufacturer’s instructions. On rolling-code systems, you may also need to place the Genie opener in learning mode and press the HomeLink button again. The exact steps depend on the vehicle and HomeLink version.
Do I need to reset the travel limits when adding a remote?
No. Adding or replacing a remote normally does not require changing the door’s travel limits. The limits control the door’s stopping positions, while remote programming controls wireless access. Adjust the travel limits only when needed and follow the required safety reversal test afterward.
How many times should I press the Genie remote button during programming?
The Genie 4062 operation manual instructs users to slowly press and release the selected remote button twice during learning, followed by a third press to operate the door. If the opener has not confirmed pairing, additional deliberate button presses may be necessary before the learning window expires.
Can I use a universal remote with Genie 4062?
Some universal garage door remotes are compatible with Genie Intellicode openers, but compatibility depends on the transmitter model and supported programming protocol. Check the universal remote’s compatibility list and manufacturer instructions before buying or programming it.
Final Thoughts
Learning how to program Genie 4062 garage door opener accessories is straightforward when you identify the correct controls and follow the appropriate sequence.
For a standard compatible remote, the main procedure is to enter programming mode using PRGM/SET, wait for the flashing purple LED, press the chosen remote button twice, and test it with a third press.
Wireless keypads require additional PIN setup, while HomeLink systems may require both vehicle training and opener synchronization.
If your garage door stops at the wrong position, inspect the door and check the travel-limit settings. Always complete the recommended safety testing after adjusting those settings.
For persistent errors, use the official Genie 4062 manual or contact Genie technical support rather than bypassing safety features or making unsupported mechanical adjustments.
Also Read:
- How to Program Genie 2028 Garage Door Opener: Easy Step-by-Step Instructions
- How to Program Genie 3055 Garage Door Opener: Easy Step-by-Step Instructions
- How to Program Genie 1035 Garage Door Opener: Step-by-Step Guide
- How to Program Genie 7155 Garage Door Opener: Complete Step-by-Step Guide
- How to Program an Old Genie Garage Door Opener: Step-by-Step Guide