

Learning how to program Genie 3055 garage door opener is helpful when you buy a new remote, replace an old keypad, move into a new home, or need to reconnect your garage door opener. The good news is that most programming tasks can be completed using the buttons on the opener and a few simple steps.
The Genie 3055, also known as the SilentMax 750, is a popular garage door opener designed for quiet operation. It uses Genie Intellicode technology, which changes the access code during normal operation to improve security.
However, programming may feel confusing if you have never used the opener before. You might wonder where the programming button is located, why the LED lights are flashing, or how many times you should press your remote.
This guide explains Genie 3055 programming in easy language. You will learn how to program a remote control, connect a wireless keypad, erase old remote controls, and understand the opener’s main programming settings.
You will also find troubleshooting solutions, helpful examples, safety precautions, and frequently asked questions.
What Is the Genie 3055 Garage Door Opener?
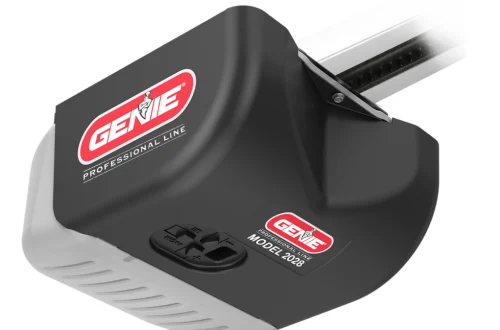
The Genie 3055 is part of Genie’s SilentMax 750 series. It is a belt-drive garage door opener intended for residential use, particularly in homes where quiet operation matters.
According to the official manufacturer, the model features a ¾ HPc motor, Intellicode security, GenieSense monitoring, and compatibility with HomeLink and Car2U vehicle-control systems.
The standard SilentMax 750 model also supports up to 16 wireless devices, including compatible remote controls and keypads. Genie Garage Door Opener+1
Main features of Genie Model 3055
| Feature | Description |
|---|---|
| Model | Genie 3055 / SilentMax 750 |
| Drive system | Belt drive |
| Motor rating | ¾ HPc |
| Security | Genie Intellicode |
| Programming controls | SET/PRGM, UP (+), DOWN (–) |
| Wireless device capacity | Up to 16 |
| Vehicle integration | HomeLink and Car2U |
| Remote control | Compatible Genie Intellicode remotes |
| Safety system | Genie Safe-T-Beam |
The 3055 model number can also appear in product variants with different accessories or connected features. Check the complete model label and supplied manual before following instructions for optional equipment.
Why might you need to program your Genie 3055?
There are several situations where garage door opener programming becomes necessary.
For example, you might purchase another remote for a family member who drives a separate car. You may also need to connect a new wireless keypad so that someone can open the garage without carrying a remote.
Programming may also be needed when a previously working remote loses its connection or when you want to remove access associated with a missing device.
For newly installed equipment, setting the door’s opening and closing travel limits is a separate procedure.
Understanding these differences is important because pairing a remote and adjusting a door’s movement are not the same task.
Things to Check Before Programming Genie 3055
Before starting, take a few minutes to prepare the opener and its accessories.
A small amount of preparation can prevent common problems such as programming timeouts, unresponsive remotes, and unexpected garage door movement.
Check the power supply
Make sure your Genie 3055 is receiving electricity.
Look at the opener’s powerhead, which is the motor unit mounted near the garage ceiling. If the opener is completely unresponsive, verify that its power outlet and the relevant circuit breaker are working.
Do not remove the electrical cover or touch internal wiring while power is connected.
Inspect the remote batteries
If you are programming a new Genie remote, make sure its protective battery tab has been removed.
If the remote has been used for a long time, its battery may need replacement.
A weak battery can cause inconsistent signals during programming.
Use the correct battery type listed for your specific remote model rather than assuming that all Genie remotes use the same battery.
Clear the garage door opening
Before testing the opener, remove objects that could interfere with the moving door.
Keep children, pets, vehicles, and other people away from the opening.
The garage door should remain fully visible while you perform programming or testing.
Never stand directly beneath a moving garage door.
Prepare a stable ladder
You may need a ladder to reach the programming buttons on the motor unit.
Place the ladder on a firm, level surface and avoid overreaching.
If you cannot safely reach the controls, ask another adult for assistance or contact a garage door professional.
Where Is the Program Button on Genie 3055?
One of the most common questions about Genie 3055 programming is where to find the programming button.
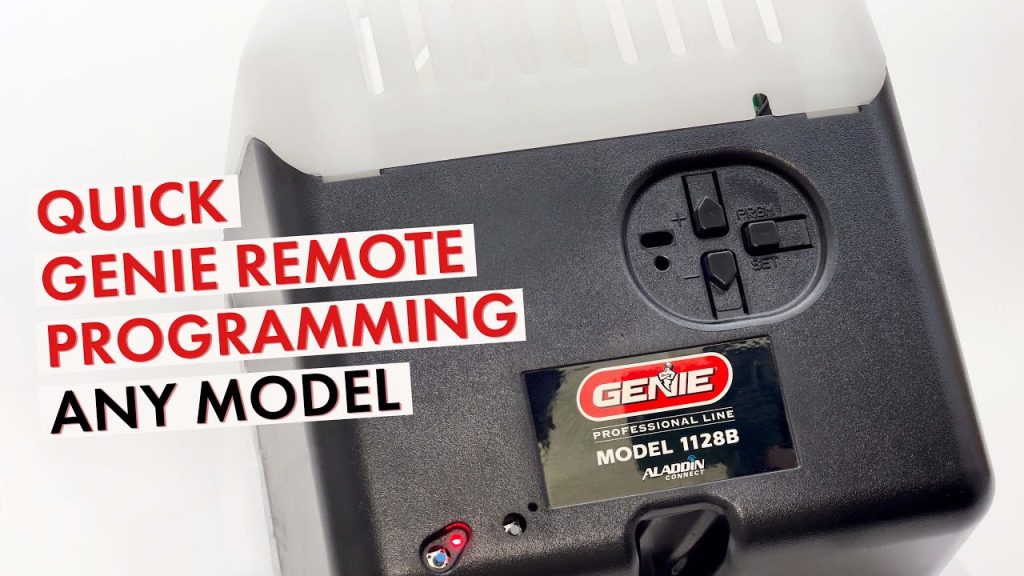
The programming controls are on the garage door opener’s motor unit, commonly called the powerhead.
Look for three small buttons and two indicator lights.
The controls generally include:
- SET/PRGM: Used to enter or confirm programming modes.
- UP (+): Used when adjusting the opening travel limit and in certain memory functions.
- DOWN (–): Used when adjusting the closing travel limit and in certain memory functions.
You should also see two LED indicators. The round and long LEDs use different colors and flashing patterns to communicate the opener’s status.
Depending on the cover or product variant, the controls may be positioned slightly differently.
Check the label on your motor unit or the official manual if the buttons are difficult to identify.
Genie 3055 LED light meanings during programming
| LED indication | Meaning in the relevant programming procedure |
|---|---|
| Round LED turns solid blue | Programming mode is being entered |
| Long LED flashes purple | Remote pairing mode is ready |
| Both LEDs flash and turn off | Remote pairing is confirmed |
| LEDs show red after a timeout | Programming window has expired |
| Long LED flashes blue | Used during certain travel-limit adjustments |
These meanings depend on the active procedure. The same LED colors can have different meanings in diagnostic or travel-limit modes.
For ordinary remote programming, the most important signal is the flashing purple light.
When that appears after pressing SET/PRGM, the opener is ready to receive the compatible remote’s signal. ManualsLib+1
How to Program Genie 3055 Garage Door Opener Remote?
The most common Genie 3055 programming task is connecting a handheld remote control.
This is useful when you purchase a replacement remote, add another remote for a family member, or reconnect an existing remote.
Follow these steps carefully:
Step 1: Activate your remote control: Remove the protective battery strip from a new remote, if present. For an older remote, confirm that the battery works and the selected button responds.
Step 2: Enter programming mode: Press and hold SET/PRGM for approximately two seconds. Release when the round LED turns blue. The long LED should begin flashing purple.
Step 3: Press the remote button twice: Stand at least five feet from the powerhead. Slowly press and release your chosen remote button twice. The opener LEDs should flash and turn off.
Step 4: Test the programmed remote: Press the same remote button a third time. The garage door should respond and begin opening or closing.
These steps follow the remote-control programming procedure described in Genie’s manual. ismartgate
What if the remote does not respond?
If the LED indicators do not confirm pairing, try pressing the remote button a little more slowly.
Avoid holding the remote directly against the opener’s motor unit.
You should also make sure that you complete the pairing process before the programming window expires.
Genie’s instructions specify a 30-second limit for individual programming steps. If the lights indicate a timeout, restart the sequence.
Example: Programming a second remote
Suppose you already have one working remote but want to add another for your spouse.
You do not normally need to erase the first remote.
Instead, enter programming mode and follow the same steps using the new remote.
Once completed, test both remotes separately to confirm that they operate the same garage door.
If you are using a multi-button remote with several garage door openers, each button must be programmed separately.
How to Program Genie 3055 Wireless Keypad?
A wireless keypad allows you to operate your garage door by entering a personal identification number, or PIN.
It is especially convenient when you want to enter the garage without using a handheld remote.
The steps below apply to the Genie Intellicode keypad style documented in the commonly used 3055 manuals. Universal and newer keypad models may have different programming instructions.
Step 1: Prepare the wireless keypad
Make sure the keypad contains working batteries.
If it is new, remove any protective battery strip.
For easier setup, program the keypad before permanently installing it outside the garage.
Allow the keypad backlighting to turn off before beginning.
Step 2: Create a personal PIN
For a compatible Genie keypad being initialized for the first time:
- Press
3,5, and7in order. - Press the
PROGRAMkey. - Wait for the keypad LED to begin flashing.
- Enter your preferred three- to eight-digit PIN.
- Press
PROGRAMagain. - Watch for two LED flashes indicating that the PIN was accepted.
For example, you could choose a private six-digit PIN that is easy for you to remember but difficult for others to guess.
Avoid using obvious combinations such as 1234 or your home address.
Step 3: Put the Genie 3055 into programming mode
Return to the garage door opener’s motor unit.
Press and hold SET/PRGM until the round blue LED illuminates.
Release the button.
The long LED should begin flashing purple.
Step 4: Connect the keypad to the opener
Once the motor unit is in programming mode:
- Make sure the keypad backlighting is off.
- Enter the PIN you created.
- Slowly press the keypad’s
UP/DOWNkey. - Repeat the
UP/DOWNkey press, usually three or four times, until the opener operates.
This process associates your keypad with the garage door opener.
Step 5: Test your keypad
Wait until the keypad has returned to its normal standby state.
Enter your PIN and press the UP/DOWN key once.
If the door responds, programming was successful.
Test the keypad again after mounting it in its intended location.
Genie’s instructions also cover programming compatible keypads for multiple openers, so the exact steps may differ if one keypad controls two or three doors. ManualsLib
How to Change the Genie 3055 Keypad PIN?
Changing your garage door keypad PIN is a good security practice, especially if you have shared the old code with someone who no longer needs access.
You may also want to change it after moving into a new home.
For the compatible Genie keypad described above, you can change an existing PIN without reconnecting the keypad to the opener.
Steps to change the keypad PIN
- Wait until the keypad backlight turns off.
- Enter your current PIN.
- Press the
PROGRAMbutton once. - Enter your new three- to eight-digit PIN.
- Press
PROGRAMagain. - Allow the keypad to return to standby mode.
- Enter the new PIN and press UP/DOWN to test it.
The old PIN should no longer operate the keypad after a successful change.
If your keypad has a different button layout, check its model-specific instructions.
How to reset a Genie wireless keypad?
If you forget your PIN, some compatible Genie keypads can be reset to their factory programming state.
To reset the keypad:
- Make sure the keypad backlighting is off.
- Press and hold
PROGRAMandUP/DOWNtogether for approximately five seconds. - Release the buttons when the keypad LED flashes twice and the lights turn off.
- Create a new PIN using the keypad initialization procedure.
- Reconnect the keypad to your Genie 3055 if necessary.
Remember that resetting a keypad and clearing the motor unit’s remote memory are different operations.
Resetting the keypad normally affects that keypad’s programming, while erasing receiver memory removes previously paired wireless devices from the opener. ManualsLib
How to Erase Genie 3055 Remote Controls From Memory?
Sometimes, reconnecting a remote is not enough.
For example, suppose you lose your garage door remote while traveling. If another person finds it, they might be able to operate your garage door.
In such situations, clearing the opener’s wireless memory is a useful security measure.
Important: This procedure removes all paired remotes, wireless keypads, and vehicle transmitters from the opener’s memory. You must reconnect the devices you want to continue using.
Step 1: Locate the programming controls
Use a stable ladder to reach the motor unit.
Find the SET/PRGM, UP (+), and DOWN (–) buttons.
Step 2: Enter programming mode
Press and hold SET/PRGM for about two seconds until the round LED turns blue.
Release the button and watch for the purple programming indication.
Step 3: Clear the wireless memory
Press and hold the UP (+) and DOWN (–) buttons simultaneously.
Continue holding them until the LED indicators turn off.
This indicates that the wireless memory-clearing procedure has completed.
Step 4: Confirm that the old remote no longer works
Stand in a safe location and press a previously programmed remote button.
The opener should not respond.
Step 5: Program the remotes you still own
Reconnect each trusted remote using the remote-programming steps earlier in this guide.
Then reconnect any wireless keypads and compatible vehicle controls.
The wired wall console should continue to operate normally after wireless memory has been cleared.
On models equipped with Aladdin Connect, wireless remote-memory clearing does not necessarily remove app access. Review the connected-device permissions separately if you are securing a newly purchased home. ismartgate
How to Set the Travel Limits on Genie 3055?
Travel limits determine how far your garage door moves when opening and closing.
These are usually configured when the garage door opener is first installed.
You might also need to review them if the opener has lost its settings or if a qualified technician has corrected a mechanical problem.
However, you should not adjust travel limits simply because a wireless remote is failing to connect.
What are garage door travel limits?
Two settings control the movement of the door:
- Down travel limit: The position where the door stops when fully closed.
- Up travel limit: The position where the door stops when fully open.
Correct travel limits help the opener stop at the proper positions without placing unnecessary pressure on the door or its hardware.
Incorrect limits can prevent the door from sealing properly or create unsafe operating conditions.
Step 1: Check the door before adjustment
Ensure the door is properly attached to the opener carriage and that the opening is clear.
Check that the safety sensors are installed and working.
Do not attempt travel-limit programming if the door is difficult to move, appears unbalanced, or has damaged springs, cables, or rollers.
Step 2: Set the down travel limit
For the standard Genie 3055 programming-button arrangement:
- Press and hold the DOWN (–) button for approximately two seconds until the appropriate blue LED comes on.
- Release the button to enter down-limit adjustment mode.
- Use the DOWN button to move the door carefully toward its fully closed position.
- Use the UP button for small corrections if necessary.
- Once the door reaches its proper closed position, press and release SET/PRGM to store the setting.
The door should be fully closed without excessive pressure against the floor.
Step 3: Set the up travel limit
After saving the down limit:
- Press and hold the UP (+) button for approximately two seconds until the blue LED indicates up-limit programming.
- Release the button.
- Use the UP button to move the door toward its normal fully open position.
- Make small corrections with the DOWN button if necessary.
- Press and release SET/PRGM to store the setting.
Do not program the door to move beyond its safe mechanical opening position.
Step 4: Allow the opener to learn its operating force
After setting the travel limits, use the wall control to run the door through the complete opening and closing movements required by your specific Genie manual.
The opener uses these movements to establish its normal force-control behavior.
Do not increase force settings to compensate for a binding or unbalanced garage door.
Step 5: Perform the safety reversal test
After completing travel-limit and force setup, test the opener’s safety reversing system.
Genie’s documentation describes using a 1½-inch-high obstruction, such as a standard 2-by-4 board laid flat, in the center of the doorway.
When the closing door contacts the test object, it must reverse.
Also check that the photoelectric Safe-T-Beam sensors detect an obstruction.
If the door fails either safety test, stop using the automatic opener until the problem is corrected.
Because travel-limit adjustment directly affects door movement, consult the exact manufacturer’s manual before making changes. If the door does not operate safely, arrange professional service rather than repeatedly adjusting it. manualshelf.com+1
How to Program Genie 3055 With HomeLink?
HomeLink is a vehicle-integrated system that allows compatible cars to control garage door openers using built-in buttons.
The Genie 3055 SilentMax 750 supports HomeLink, according to its official product information.
This means you may be able to operate your garage door without keeping a separate handheld remote inside your vehicle.
Step 1: Prepare the vehicle
Park the vehicle outside the garage with the garage door in view.
Turn on the vehicle’s electrical system if required by its HomeLink instructions.
Identify the HomeLink buttons, which may be located near the rearview mirror, overhead console, or sun visor.
Step 2: Train the HomeLink button
For a typical compatible HomeLink system:
- Hold your working Genie remote near the vehicle’s HomeLink controls at the distance specified by your vehicle manufacturer.
- Press and hold the desired HomeLink button and the remote button according to the HomeLink instructions.
- Watch for the HomeLink indicator to change its flashing behavior.
- Release the buttons when the vehicle indicates that the training stage has completed.
The exact sequence varies between vehicle manufacturers and HomeLink generations.
Step 3: Pair HomeLink with the Genie opener
If the vehicle requires rolling-code synchronization:
- Locate the SET/PRGM button on the Genie 3055 powerhead.
- Enter the opener’s remote-programming mode.
- Return to the vehicle.
- Press and release the trained HomeLink button as directed by the vehicle’s instructions.
- Repeat if necessary until the opener recognizes the signal.
Step 4: Test HomeLink operation
Press the programmed HomeLink button while the garage door is fully visible.
The door should respond.
If it does not work, check whether your vehicle requires an additional training sequence.
Some newer HomeLink systems use different programming methods, and clearing vehicle-wide HomeLink memory may erase unrelated devices. Avoid performing a full vehicle reset unless necessary.
For accurate vehicle-specific instructions, use the official HomeLink website and Genie’s Model 3055 support page.
Genie 3055 Programming Not Working? Common Problems and Solutions
Even when you follow the instructions carefully, your Genie garage door opener may sometimes fail to recognize a remote or keypad.
The cause is not always a programming error.
Dead batteries, incompatible accessories, wireless interference, safety-sensor problems, and an enabled security lock can all affect operation.
Genie 3055 troubleshooting table
| Problem | Possible cause | Suggested solution |
|---|---|---|
| Remote does not connect | Programming mode expired | Restart the pairing sequence |
| Remote works only nearby | Weak battery or interference | Replace battery and check interference |
| Keypad does not respond | Incorrect PIN or lost pairing | Verify PIN and reprogram |
| Purple LED stops flashing | Pairing window expired | Enter programming mode again |
| Remote stops working after adding devices | Receiver memory issue | Check device capacity and reprogram trusted devices |
| Remote does not work, but wall button does | Sure-Lock enabled or wireless issue | Check lock settings and remote |
| Door opens but will not close | Safety beam obstructed or misaligned | Inspect and align sensors |
| Door reverses unexpectedly | Obstruction, limit issue or mechanical fault | Inspect the doorway and seek service if needed |
| Motor does not respond | Electrical issue | Check power supply safely |
Problem 1: The remote will not program
First, check that the remote is compatible with your Genie 3055.
A remote designed for a different manufacturer’s system might not communicate with the opener.
Next, verify that the remote battery is working.
Enter programming mode again and wait for the flashing purple indicator.
Stand at least five feet away and press the selected button twice, slowly and deliberately.
If the opener still does not acknowledge the remote, check the accessory’s model-specific programming instructions.
Problem 2: The Genie 3055 remote has a short range
A remote that works close to the garage but not from the driveway may have a signal problem.
Possible causes include a weak battery or radio-frequency interference.
Some electronic devices and certain incompatible LED light bulbs can interfere with garage door opener signals.
Try testing with the garage light turned off and with nearby electronic accessories temporarily disconnected, where safe.
If the remote works at normal range after removing a source of interference, address that issue rather than repeatedly reprogramming the remote.
Problem 3: The keypad accepts the PIN but does not open the door
Check whether the keypad was successfully paired with the motor unit.
A keypad PIN can be stored locally even when the keypad is not properly connected to the garage door opener.
Repeat the keypad-pairing process.
Also inspect its batteries and confirm that the keypad is compatible with the opener.
Problem 4: The garage door opens but will not close
This problem is often associated with the safety-sensor system rather than remote programming.
Look near the bottom of the garage doorway for the two Safe-T-Beam sensor units.
Check whether an object is blocking the infrared beam.
Clean the sensor lenses and confirm that the units are properly aligned.
Do not disconnect or bypass the safety sensors to make the door close.
Genie specifically warns that its safety system must remain installed and operational. Product Support Information
Problem 5: Genie 3055 remote suddenly stops working
If the remote worked yesterday but is unresponsive today, check the wall console’s Sure-Lock feature.
When Sure-Lock is enabled, wireless remote operation can be disabled.
Turn off the lock feature according to the instructions for your wall console and test the remote again.
If the problem continues, replace the remote battery and attempt reprogramming.
These checks are also consistent with Genie’s support guidance for wireless-device problems. Product Support Information
Tips for Successful Genie 3055 Programming
A few simple habits can make programming easier and reduce future problems.
1. Keep your remote within a reasonable distance
During pairing, follow Genie’s recommendation to stand at least five feet away from the powerhead.
Holding the remote directly against the motor unit is not necessary.
2. Complete programming without long pauses
The programming window is limited.
Before pressing SET/PRGM, have your remote or keypad ready.
This helps prevent the LED indicators from timing out before you finish.
3. Program one device at a time
When adding several remotes, pair and test each one separately.
This makes it easier to identify which device is not connecting properly.
4. Use a secure keypad PIN
Choose a PIN that is not easy to guess.
Avoid sharing your code unnecessarily. If you give temporary access to a visitor or service provider, review your keypad’s temporary-PIN feature if supported.
5. Avoid unnecessary memory clearing
You generally do not need to erase the entire receiver memory to add one remote.
Clear the memory when there is a security concern, when troubleshooting requires it, or when directed by the manufacturer.
6. Keep the owner’s manual available
Different Genie accessories can have different button combinations.
Save a copy of the official Genie 3055 manual and support resources so that you can check instructions whenever needed.
Frequently Asked Questions About Genie 3055 Programming
How do I put my Genie 3055 in programming mode?
Press and hold the SET/PRGM button on the motor unit for approximately two seconds. Release the button when the round LED turns blue. The long LED should begin flashing purple, indicating the opener is ready for remote pairing. Complete the next step before the programming window expires.
How do I program a new remote to Genie 3055?
Put the opener into programming mode, stand at least five feet away, and slowly press and release the chosen remote button twice. Wait for the opener LEDs to flash and turn off. Press the same remote button again to test the connection.
Where is the learn button on Genie 3055?
On the Genie 3055, the main remote-pairing control is labeled SET/PRGM or a similar program/set label. It is located on the opener’s powerhead near the UP and DOWN programming buttons and LED indicators. The exact position depends on the motor housing.
Can I program Genie 3055 without a remote?
Yes. You can program a compatible Genie wireless keypad using its PIN setup process and the opener’s SET/PRGM button. A compatible vehicle control may also be programmed using its own instructions. However, some vehicle HomeLink programming procedures require an existing working handheld remote.
Why is my Genie 3055 blinking purple?
A flashing purple LED can indicate that the opener is in wireless remote-programming mode. This is expected after entering the correct pairing sequence. However, purple LED patterns can also have diagnostic meanings, so check whether the light appears during programming or during normal operation.
How do I reset my Genie 3055 remote programming?
You can erase paired wireless devices by entering programming mode and holding the UP and DOWN buttons together until the LEDs turn off. This clears the opener’s wireless-device memory, not necessarily every setting on the motor. Afterward, reconnect your trusted remotes, keypads, and vehicle transmitters.
How many remotes can Genie 3055 support?
According to Genie, the SilentMax 750 Model 3055 can pair with up to 16 wireless devices. This total includes compatible remote controls and wireless keypads rather than guaranteeing 16 remotes plus additional accessories.
Can I program a universal remote to Genie 3055?
Some universal garage door remotes are compatible with Genie Intellicode openers, but compatibility depends on the specific remote model and supported technology. Check the manufacturer’s compatibility list and follow that remote’s instructions. Do not assume that every universal remote will work.
Why is my Genie 3055 keypad not programming?
Common causes include weak batteries, an incorrect initialization sequence, an expired pairing window, or using instructions for the wrong keypad model. Confirm the keypad type, create a valid PIN, and repeat the opener-pairing process. If needed, reset the keypad before beginning again.
Can I use Genie 3055 with my car’s built-in garage door buttons?
Yes. The standard Genie SilentMax 750 Model 3055 supports HomeLink and Car2U systems. The programming procedure depends on the vehicle’s equipment and model year. Some vehicles need an initial remote-training process followed by rolling-code synchronization with the motor unit.
Will unplugging Genie 3055 erase the programming?
Normally, unplugging a Genie garage door opener does not erase its stored remote programming. The opener is designed to retain its settings through ordinary power interruptions. However, if it behaves unexpectedly after power is restored, check the manufacturer’s troubleshooting information.
How do I know if my Genie 3055 remote is programmed successfully?
During pairing, the opener’s LED indicators should flash and turn off to confirm that the remote has been recognized. Press the programmed remote button again while the doorway is clear and visible. If the garage door operates normally, the pairing was successful.
Final Thoughts
Learning how to program Genie 3055 garage door opener is easier when you understand the difference between remote pairing, wireless keypad programming, memory clearing, and travel-limit adjustment.
For most homeowners, the main task is connecting a remote. You can usually complete this by using the SET/PRGM button, waiting for the flashing purple LED, and pressing the remote button twice before testing it.
Wireless keypad programming requires an additional step to create and save a secure PIN.
If the opener does not respond, check the batteries, accessory compatibility, programming timeout, and wall-console lock settings before assuming that the motor unit is faulty.
Most importantly, always keep the garage doorway clear during testing. Never bypass safety sensors or attempt repairs involving high-tension springs and cables.
For additional help, refer to the official Genie 3055 manual or contact The Genie Company through its support website.
Also Read:
- How to Program Genie 1035 Garage Door Opener: Step-by-Step Guide
- How to Program Genie 7155 Garage Door Opener: Complete Step-by-Step Guide
- How to Program an Old Genie Garage Door Opener: Step-by-Step Guide
- How to Program Genie 7055 Garage Door Opener: Remote, Keypad, and Reset Instructions
- How to Program Genie Garage Door Opener: Complete Step-by-Step Guide