

Programming a garage door opener might seem difficult, especially if you have just installed a new system, purchased a replacement remote, or forgotten your wireless keypad code. Fortunately, learning how to program a Genie 7155 garage door opener is usually straightforward when you follow the correct instructions.
The Genie 7155 is a smart, belt-drive garage door opener designed for quiet operation and convenient access. Depending on the exact model and accessories, you can control your garage door using a handheld remote, wireless keypad, compatible vehicle controls, or the Aladdin Connect smartphone application.
However, each programming method works differently. The steps for adding a remote are not the same as changing a keypad PIN or connecting the opener to Wi-Fi.
This guide explains Genie 7155 programming in simple language, including the correct buttons, indicator lights, common mistakes, and solutions to problems you might encounter.
Quick Answer: How Do You Program a Genie 7155 Remote?
To program a compatible remote to your Genie 7155 garage door opener:
- Locate the PRGM/SET button on the garage door opener motor.
- Press and hold it for approximately two seconds.
- Release the button when the round LED turns blue and the long LED begins flashing purple.
- Stand at least five feet away from the opener.
- Slowly press and release your selected remote button twice.
- Wait for the opener’s indicator lights to flash and turn off.
- Press the remote button once more to test the garage door.
If the garage door responds, you have successfully programmed the remote.
These steps follow the model 7155 programming manual. Each remote button must be programmed separately, and individual programming steps have a 30-second timeout.
What Is the Genie 7155 Garage Door Opener?
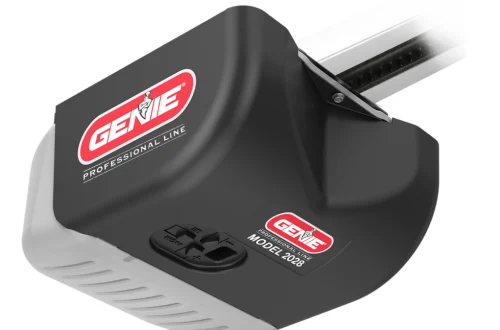
The Genie StealthDrive Connect 7155 is a residential garage door opener manufactured by The Genie Company.
It uses a steel-reinforced belt-drive mechanism to raise and lower a compatible sectional garage door. Compared with many traditional chain-drive systems, its belt mechanism is designed to reduce operating noise.
The 7155 also includes Intellicode security technology, which changes the transmitted access code during operation to help prevent unauthorized use.
Some notable features include:
- Quiet belt-drive operation for attached garages.
- Integrated Aladdin Connect smartphone control.
- Compatibility with supported HomeLink and Car2U vehicle systems.
- GenieSense monitoring and diagnostics.
- Battery-backup functionality.
- Support for up to 16 wireless devices, including remotes and keypads.
Genie’s product information also states that included remotes may already be programmed at the factory, making a separate setup unnecessary for some new installations.
Genie 7155 programming options
| Programming task | What you need |
|---|---|
| Pair a remote control | Compatible remote and PRGM/SET button |
| Program a wireless keypad | Compatible keypad and PIN |
| Connect your car’s controls | HomeLink or Car2U system |
| Enable smartphone control | Aladdin Connect app and Wi-Fi |
| Set opening and closing positions | UP, DOWN, and PRGM/SET buttons |
| Remove old remote access | Opener’s wireless-memory clearing function |
Before starting, identify the exact accessory or function you want to program.
Things to Check Before Programming the Genie 7155
A few basic checks can prevent most programming problems.
1. Confirm the exact model
Look for the identification label on the garage door opener’s motor housing.
You may find different Genie 7155 variants, including models with different lighting or included accessories. Although many programming steps are shared, always follow the manual that corresponds to your particular model.
2. Check the power connection
Make sure the opener is properly connected to a functioning electrical outlet.
If the opener has no power, its programming buttons and indicator lights cannot operate normally. Check the outlet and the applicable circuit breaker if the motor does not respond.
3. Inspect the remote batteries
If you are programming a new remote, remove any protective battery tab.
For an older remote, check that the battery is installed correctly and has enough power.
A weak remote battery can make the programming process unreliable even when the opener itself is working.
4. Clear the garage door area
Before testing the opener:
- Remove objects from the doorway.
- Keep children and pets away.
- Stay clear of moving sections and tracks.
- Make sure the door is properly installed.
- Never stand beneath a moving or partially open door.
If the door is damaged, off-track, unusually heavy, or has a broken spring or cable, stop and contact a qualified garage door technician.
5. Check the safety sensors
The Genie 7155 uses safety sensors near the bottom of the garage door opening.
These sensors detect obstructions and help prevent the door from closing on people or objects. Do not disconnect, bypass, or remove them to solve a programming issue.
Genie specifies that these safety devices are essential to safe operation. Product Support Information
Where Is the Learn Button on the Genie 7155?
One of the most common questions is where to find the Genie 7155 learn button.
On this model, the main programming control is labeled PRGM/SET or SET/PRGM, rather than simply LEARN.
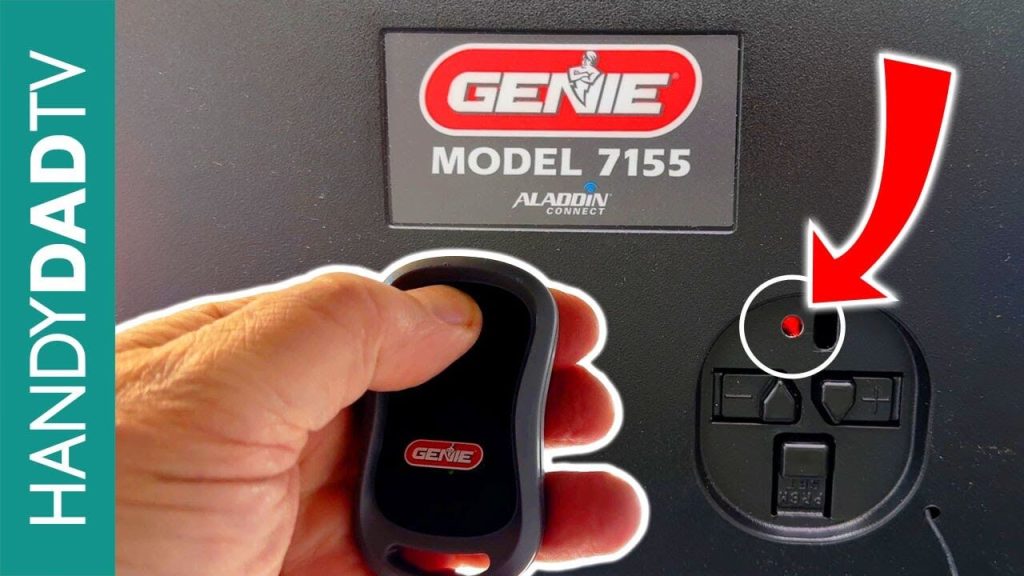
The button is located on the motor unit mounted to the garage ceiling. Look around the accessible control area on the powerhead, near the UP and DOWN adjustment buttons and LED indicators.
Depending on the housing design, the control area may be behind or near a light cover.
Understanding the Genie 7155 buttons
| Button or indicator | Purpose |
|---|---|
| PRGM/SET | Enter programming mode and save travel-limit settings |
| UP (+) | Adjust the opening position |
| DOWN (−) | Adjust the closing position |
| Round LED | Displays programming and diagnostic information |
| Long LED | Displays programming and diagnostic information |
During remote programming, a steady blue round LED followed by a flashing purple long LED indicates the opener is ready for the next pairing step.
Important: Avoid experimenting with long button presses. Some button combinations erase saved wireless devices or change travel settings.
How to Program a Genie 7155 Garage Door Opener Remote?
Programming a Genie 7155 remote allows the opener to recognize a compatible handheld transmitter.
This process is useful when you buy an additional remote, replace a lost transmitter, or need to reconnect an existing remote.
Step 1: Prepare the remote
Start by checking the remote control.
If it is new, remove the protective film or battery tab. If it has already been used, make sure its battery is working.
Choose the button you want to use for this garage door.
For example, if your remote has three buttons, you might use the first button for the main garage door and reserve the others for additional compatible openers.
Step 2: Find the PRGM/SET button
Go to the garage door opener mounted near the ceiling.
Use a stable ladder when necessary, and avoid reaching over moving door components.
Locate the PRGM/SET button and the nearby round and long indicator lights.
Step 3: Enter programming mode
Press and hold the PRGM/SET button for approximately two seconds.
Watch the indicator lights.
The round LED should turn blue. After you release the programming button, the long LED should begin flashing purple.
This means the opener has entered remote programming mode.
Do not continue pressing unrelated buttons while the light is flashing.
Step 4: Program the remote button
Stand at least five feet away from the opener.
Slowly press and release the remote button you selected two times.
Do not hold the remote directly against the motor housing.
When pairing is successful, both opener LEDs will flash and then turn off.
If confirmation does not appear, you may need to press the remote button a few additional times. Do not press it so quickly that the opener cannot recognize the transmissions.
Step 5: Test the programmed remote
Press the same remote button again.
The garage door should begin opening or closing, depending on its starting position.
Make sure the door travels normally and stops where expected.
If the opener responds correctly, the remote is ready to use.
Step 6: Program additional remote controls
If another family member needs a remote, repeat the same process for that remote.
You can also assign different buttons on a compatible multi-button remote to different garage door openers.
Every button you want to use must be paired with the appropriate opener.
Troubleshooting tip: Genie provides approximately 30 seconds for each programming step. If the indicator lights turn red because the process timed out, restart the programming sequence instead of continuing from the middle. ManualsLib
How to Program a Genie 7155 Wireless Keypad?
A wireless keypad lets you open your garage without carrying a remote control.
This is especially helpful when you are walking, gardening, or returning home without your vehicle.
The Genie 7155 keypad programming process is different from remote pairing because it involves both syncing the keypad with the opener and choosing a personal identification number.
Step 1: Prepare the keypad
Remove the battery compartment cover and any protective battery tab, if present.
Make sure the keypad has functioning batteries.
For the Genie keypad described in the model 7155 manual, the factory default PIN is 357.
This default applies to the specified Genie keypad, not necessarily every replacement keypad sold for the opener.
Step 2: Activate the opener’s programming mode
Locate the PRGM/SET button on the garage door opener.
Press and hold it until the round LED turns blue, then release it.
The long LED should begin flashing purple.
The opener is now ready to communicate with the keypad.
Step 3: Enter the factory PIN
Make sure the keypad’s backlighting has turned off before entering the code.
Press the following numbers in order:
3 → 5 → 7
Next, press the keypad’s UP/DOWN key slowly three or four times until the garage door opener responds.
This confirms that the keypad and the opener have been paired.
Step 4: Change the default PIN
Keeping the factory PIN is not recommended because it is widely documented.
To create your personal access code:
- Enter the current PIN, which is 357 for a new keypad using the documented factory settings.
- Press the keypad’s PROGRAM key once.
- Enter a new PIN containing three to eight digits.
- Press PROGRAM once more to save it.
For example, you could choose a six-digit number that you can remember but other people cannot easily guess.
Avoid obvious combinations such as 1234, repeated numbers, birthdays, or your house number.
Step 5: Test the wireless keypad
Wait for the keypad backlighting to turn off.
Enter your new PIN and press the UP/DOWN button.
The garage door should respond.
If the keypad does not work, check its batteries, confirm the opener is receiving power, and repeat the pairing instructions.
The documented keypad remains active for about 15 seconds following a successful PIN entry. During that period, pressing another key can operate the opener. Be mindful of this behavior when using the keypad around children.
Step 6: Install the keypad safely
Once programming is complete, mount the keypad where it can be reached easily by authorized users.
Genie’s instructions specify installation within sight of the garage door, at least five feet above the floor, and away from moving parts.
Follow the keypad’s mounting instructions and use appropriate hardware for the wall surface.
The original keypad documentation includes instructions for drilling pilot holes and installing the mounting screws.
How to Change or Reset the Genie 7155 Keypad PIN?
If you remember your current keypad PIN, changing it is simple.
Enter your existing PIN, press PROGRAM once, enter a new three-to-eight-digit PIN, and press PROGRAM again.
Your previous PIN should stop working.
What if you forget your keypad PIN?
For the Genie keypad covered by the official WKP instructions:
- Make sure the keypad backlighting is off.
- Press and hold PROGRAM and UP/DOWN together for approximately five seconds.
- Wait for the keypad indicators to flash and turn off.
- Release the buttons.
- Start the keypad pairing process again using the documented factory settings.
This action resets the keypad’s programming. It is different from erasing the garage door opener’s entire wireless-device memory.
If you use a different keypad model, consult its instructions before attempting a reset. The Genie Company
How to Program the Genie 7155 to HomeLink in Your Car?
Many vehicles include a built-in garage door control system called HomeLink.
HomeLink allows you to open and close a compatible garage door using buttons installed inside your vehicle.
The Genie 7155 supports HomeLink, although the instructions may vary slightly depending on the vehicle’s model and year.
Step 1: Identify the HomeLink buttons
Sit inside your vehicle and locate the HomeLink controls.
These buttons are commonly installed near the rearview mirror, on the overhead console, or on the sun visor.
Make sure the vehicle is parked safely outside the garage, away from the garage door’s movement.
Step 2: Clear old HomeLink settings if necessary
If you are setting up HomeLink for the first time and want to erase previous programming, the Genie manual describes holding the first and third HomeLink buttons together until the indicator changes from a slow blink to a rapid blink.
This typically takes around 20 seconds.
Warning: Clearing HomeLink memory removes previously programmed garage door controls from the vehicle. Do not do this if you need to preserve other programmed devices.
Some vehicles have different procedures, so consult the vehicle owner’s manual.
Step 3: Train HomeLink using your Genie remote
Hold a working Genie handheld remote approximately two inches from the selected HomeLink button.
Press and hold the remote button.
At the same time, press and hold the HomeLink button you want to program.
Watch the HomeLink indicator.
When it changes from a slow flash to a rapid flash, release both buttons.
The vehicle has now learned the necessary information from the handheld remote.
Step 4: Put the Genie 7155 into programming mode
Go to the garage door opener.
Press and hold PRGM/SET until the round LED turns blue, then release the button.
Wait for the long LED to flash purple.
Step 5: Complete the HomeLink connection
Return to the vehicle.
Press the selected HomeLink button for approximately two seconds, then release it.
Repeat this action.
You may need to press the button a few more times before the garage door responds.
When the opener recognizes the vehicle control, the programming process is complete.
Step 6: Test the system
Press the programmed HomeLink button and confirm that the garage door operates correctly.
If it does not work, repeat the instructions while paying attention to the indicator lights and the timing of each step.
These steps follow the Genie 7155 vehicle-control programming instructions. ManualsLib
How to Connect Genie 7155 to Wi-Fi Using Aladdin Connect?
One of the most useful features of the Genie 7155 is its integrated Aladdin Connect technology.
This allows you to operate and monitor a compatible garage door through a smartphone.
You can also use the app’s supported features to check door activity, receive notifications, and manage access for other users.
Step 1: Check your garage Wi-Fi signal
Before downloading the app, verify that your home’s Wi-Fi network reaches the garage.
Connect your smartphone to your home Wi-Fi network.
Walk to the area where the opener is installed and check the signal strength.
Genie recommends having at least two bars of Wi-Fi signal at the installation location.
If the signal is weak, consider moving the router, improving its placement, or installing a Wi-Fi extender.
Step 2: Download Aladdin Connect
Open the Apple App Store or Google Play Store.
Search for the official Aladdin Connect application and install it.
Avoid downloading unfamiliar applications that claim to provide Genie programming functionality.
Step 3: Create or sign in to your account
Open the Aladdin Connect app.
Follow the instructions to register or sign in.
Depending on the current app version, you may need to verify your account or grant permissions needed for device setup.
Step 4: Add the garage door opener
Select the option to add a compatible garage door opener.
Choose the integrated Genie opener option when prompted.
The app may ask you to scan a QR code.
Look for the Aladdin Connect QR code on the opener or in its documentation.
Follow the on-screen instructions for your device.
Step 5: Connect the opener to Wi-Fi
Use the app’s guided setup process to connect the opener to your home network.
Make sure you enter the correct Wi-Fi password.
If the app cannot connect to your network, check whether your router’s band and security settings meet the device’s requirements.
Some smart garage door devices require a compatible 2.4 GHz network, so confirm the specifications for your exact unit rather than assuming every wireless configuration will work.
Step 6: Test smartphone control
After completing setup, follow the app instructions to test garage door operation.
Verify that the correct garage door appears in the application.
Also check that the app reports the door’s status accurately.
Step 7: Configure notifications and access
Once the connection works, explore the available settings.
You may be able to:
- Receive alerts when the garage door opens or closes.
- Review the garage door’s activity history.
- Give authorized family members access.
- Create supported door-monitoring rules.
- Integrate supported smart-home services.
Only grant remote access to people you trust.
Remote operation can move the garage door unexpectedly, so keep the door’s safety features working and follow Genie’s unattended-operation warnings.
How to Program Genie 7155 Garage Door Travel Limits?
Travel limits determine how far your garage door opens and closes.
This adjustment is generally required during initial installation, following certain repairs, or when the programmed door positions are incorrect.
It is not necessary to change travel limits simply because you are adding a new remote.
Incorrect adjustments can damage the door or prevent its safety systems from operating correctly.
How to set the DOWN limit?
Before adjusting travel limits, make sure the opener is properly installed, the carriage is engaged, and the door moves freely.
Genie’s instructions require normal AC power rather than battery-backup operation while setting limits.
Start with the door somewhere between fully open and fully closed.
- Press and hold the DOWN arrow button until the long LED turns blue.
- Release the DOWN button. The long LED should flash blue.
- Press and hold DOWN again to move the door toward its fully closed position.
- Release the button as the door reaches the floor.
- Use the UP or DOWN controls to make small corrections.
- Press and release PRGM/SET to save the position.
The opener’s LEDs should flash blue and turn off.
The closed door should make contact with the floor and compress its weather seal enough to form a proper seal.
Do not force the bottom of the door against the floor so firmly that the door bends or buckles.
How to set the UP limit?
After saving the closed position, program the fully open position.
- Press and hold the UP arrow until the long LED turns blue.
- Release the button and check that the round LED flashes blue.
- Press and hold UP again until the door reaches the correct open position.
- Use the DOWN button if the door opens too far.
- Make small adjustments until the opening position is correct.
- Press and release PRGM/SET to save the setting.
The LEDs should flash blue and turn off.
Do not adjust the door so far that it bends, strains the door components, or places excessive tension on the spring cables.
Genie’s manual provides specific illustrations for setting both travel limits.
How to complete force programming?
Once both travel limits are set, the opener needs to learn the amount of force necessary to move the garage door.
On the Genie 7155, this process is normally automatic.
Operate the door using the wall control through a complete closing and opening cycle, allowing it to reach both programmed limits.
The opener records its operating force during this process.
Do not increase force settings to compensate for a broken spring, damaged track, unbalanced door, or binding mechanism.
Perform the safety reversal test
After setting the limits and force controls, verify that the garage door reverses when it encounters an obstruction.
Genie’s instructions specify placing a standard 2×4 board flat on the floor at the center of the door opening.
Close the door using the wall control.
When the door contacts the board, it should stop and reverse within two seconds.
If the door fails the test, stop using the automatic opener until the problem has been corrected.
Genie recommends performing this test monthly. ManualsLib
How to Reset Genie 7155 Garage Door Opener Remote Memory?
You may need to erase wireless programming when a remote has been lost, stolen, or given to someone who should no longer have access.
However, resetting the remote memory is different from resetting a keypad PIN or adjusting the opener’s travel limits.
Important: The following procedure removes all programmed radio-frequency remotes, keypads, and vehicle transmitters. You must reconnect the devices you still want to use.
Step 1: Enter programming mode
Locate the PRGM/SET button on the garage door opener.
Press and hold it until the round LED turns blue, then release the button.
The long LED will begin flashing purple.
Step 2: Clear wireless-device memory
Press and hold the UP and DOWN buttons together.
When both indicator LEDs turn blue, release the buttons.
This clears the opener’s stored radio-frequency device programming.
Do not continue holding the buttons to the green-indicator stage unless you specifically intend to clear a wireless wall console.
Step 3: Verify that the old remote no longer works
Press a button on a previously programmed remote.
The garage door opener should not respond.
This confirms that the old wireless programming has been removed.
Step 4: Reprogram authorized devices
Pair your existing remotes and keypads again using the instructions in this guide.
You will also need to reconnect compatible vehicle transmitters.
According to the Genie 7155 manual, clearing RF memory through this procedure does not clear Aladdin Connect. The wired wall console should also continue to operate normally, if one is installed. ManualsLib
Common Genie 7155 Programming Problems and Solutions
Even when you follow the correct instructions, Genie 7155 programming may not work on the first attempt.
The following troubleshooting table can help you identify common causes.
| Problem | Possible cause | Suggested solution |
|---|---|---|
| Remote does not work | Weak battery or pairing problem | Replace battery and pair again |
| Purple LED does not appear | Incorrect programming sequence | Restart using PRGM/SET |
| Programming times out | Too much time between steps | Restart and complete each step promptly |
| Keypad code is rejected | Wrong PIN or unsynchronized keypad | Reset or reprogram the keypad |
| Door opens but will not close | Sensor obstruction or alignment issue | Inspect the Safe-T-Beam sensors |
| HomeLink does not respond | Vehicle pairing incomplete | Repeat the vehicle-specific procedure |
| Wi-Fi connection fails | Weak signal or network incompatibility | Check router and signal strength |
| Door stops at the wrong position | Incorrect travel limits or mechanical issue | Inspect door and verify settings |
| Remote has a short operating range | Battery or radio interference | Replace battery and check for interference |
Problem 1: The remote will not pair
First, check whether the remote is compatible with the Genie 7155.
Not every garage door remote can communicate with Genie Intellicode openers.
Next, replace the remote battery if necessary.
Follow the exact sequence: activate programming mode, stand at least five feet from the opener, press and release the remote button twice, and test.
If you are trying to connect several remote buttons, program them individually.
Problem 2: The long LED keeps flashing purple
A flashing purple long LED normally indicates that the Genie opener is waiting to receive a compatible wireless programming signal.
Press the intended remote button slowly as directed.
If the opener does not recognize the remote, verify its compatibility and battery condition.
If the programming window expires, start again.
Problem 3: Genie 7155 keypad stops working
If the keypad worked previously but no longer operates the garage door, check its battery condition.
Also verify that you are entering the correct PIN.
If you recently erased the opener’s remote memory, the keypad will need to be paired again.
If you have forgotten the PIN, use the reset process appropriate for your keypad model.
Problem 4: The garage door opens but does not close
This problem is not always related to programming.
Inspect the safety sensors near the lower edges of the doorway.
Check that nothing is blocking the sensors and that they are properly aligned.
Also look for damaged wiring or a problem with the garage door itself.
Do not bypass the sensors or repeatedly force the door to close. If the cause is unclear, seek qualified service.
Problem 5: Genie 7155 HomeLink programming fails
Check the vehicle manufacturer’s instructions.
Older or differently configured HomeLink systems may require different steps from those in the general Genie guide.
Confirm that your handheld Genie remote operates the garage door before using it to train the vehicle controls.
Repeat the pairing process and test after each attempt.
Problem 6: Aladdin Connect cannot find the garage door opener
Start by checking the Wi-Fi signal where the motor unit is installed.
Confirm that you are using the official Aladdin Connect application and the correct setup procedure for an integrated Genie opener.
If your home network has separate Wi-Fi bands, confirm that the network you select is supported.
Also make sure the opener has completed its basic installation, limit programming, and safety testing before attempting smartphone setup.
Tips to Keep Your Genie 7155 Working Properly
Programming the opener is only one part of maintaining a dependable garage door system.
Following a few simple maintenance practices can help prevent common issues.
Check the batteries regularly
Replace remote and keypad batteries when the controls become unreliable or their indicators show low power.
Use the battery type recommended for the specific accessory.
Test the safety reversal system
Perform the contact reversal test every month as directed by Genie.
Never ignore a door that fails to reverse when it contacts the test board.
Inspect the garage door
Look for loose hardware, unusual noise, damaged rollers, and movement that appears uneven.
Do not attempt to repair garage door springs or cables yourself. These components can remain under dangerous tension.
Keep your access codes private
Choose a keypad PIN that is difficult to guess.
Avoid sharing it unnecessarily.
If a remote is lost or stolen, erase the opener’s RF memory and reprogram the devices you still possess.
Maintain a reliable Wi-Fi connection
If you use Aladdin Connect, keep your router functioning properly and update the application when appropriate.
Review app access permissions periodically, especially after changing household members or authorized users.
Keep the owner’s manual available
The model-specific manual contains important information about installation, programming, diagnostic lights, and maintenance.
Refer to it before changing advanced settings.
Frequently Asked Questions About Genie 7155 Programming
How do I program my Genie 7155 garage door opener?
Locate the PRGM/SET button on the motor unit. Hold it for approximately two seconds until the round LED turns blue and the long LED begins flashing purple. Stand at least five feet from the opener and press your desired compatible remote button twice, slowly releasing it after each press. Test the remote by pressing the button again. If the garage door responds, programming is complete.
Where is the learn button on a Genie 7155?
The Genie 7155 uses a PRGM/SET programming button instead of a button labeled LEARN. It is located on the ceiling-mounted opener’s powerhead, near the UP and DOWN controls and LED indicators. The exact appearance of the control area may vary with the model’s housing.
How do I program a Genie 7155 keypad?
For the Genie keypad described in the 7155 manual, enter programming mode on the opener and then enter the factory PIN 357 on the keypad. Press the UP/DOWN key slowly three or four times until the garage door responds. After pairing, change the default PIN using the keypad’s PROGRAM button.
How do I reset my Genie 7155 garage door opener?
The correct reset procedure depends on what you want to change. You can reset the keypad PIN, erase the opener’s stored wireless-device memory, or adjust the door’s travel limits. These are different operations. To remove all existing RF remotes and keypads, use the memory-clearing procedure described earlier rather than experimenting with button combinations.
Why is the purple light flashing on my Genie garage door opener?
During remote programming, a flashing purple long LED normally indicates that the opener is waiting for a wireless signal. Press and release the selected compatible remote button twice to complete pairing. If the light behavior occurs outside programming mode or the opener still does not work, consult the model-specific diagnostic instructions.
How do I program Genie 7155 to my car?
If your vehicle supports HomeLink, train the selected HomeLink button using a functioning Genie remote. Next, place the Genie opener into programming mode using PRGM/SET. Press the programmed HomeLink button according to the vehicle and Genie instructions until the garage door responds. Follow your vehicle’s manual because procedures may differ by manufacturer and model year.
Can I program a Genie 7155 without a remote?
Yes. You can program a compatible Genie wireless keypad without using a handheld remote. An integrated Aladdin Connect opener can also be configured through its smartphone application. However, some vehicle-based programming systems may require a working handheld transmitter during initial setup.
What is the default PIN for a Genie garage door keypad?
The Genie WKP keypad documented with the model 7155 has a factory default PIN of 357. This number is used during initial pairing. After the keypad is connected, Genie recommends changing the default to a private three-to-eight-digit PIN. Other keypad models may have different initial setup instructions.
How many remotes can I program to Genie 7155?
According to Genie’s model 7155 product information, the opener supports up to 16 wireless devices, including compatible remotes and keypads. This is a combined device capacity rather than a guarantee of 16 handheld remotes in every configuration. Check the manual if you are managing a large number of accessories.
Why does my Genie 7155 remote work only sometimes?
Intermittent operation can result from a weak remote battery, radio interference, poor signal reception, or another electrical or mechanical problem. Start by replacing the remote battery and testing the opener from different locations. If the door operates reliably from the wired wall control but not the remote, investigate wireless communication and pairing.
Does Genie 7155 work with Wi-Fi?
Yes. The Genie StealthDrive Connect 7155 includes integrated Aladdin Connect technology. After completing the initial setup, you can use the supported smartphone application for remote control, activity monitoring, and notifications. The garage must have an adequate Wi-Fi signal, and the opener must be installed and tested correctly.
How long does Genie 7155 programming take?
Programming a compatible handheld remote usually takes only a few minutes when the equipment is working properly. Keypad setup and HomeLink pairing may take longer. Wi-Fi setup can also take additional time, depending on network conditions and account configuration. The opener’s individual remote-programming steps have approximately 30-second time limits.
Final Thoughts
Learning how to program a Genie 7155 garage door opener becomes easier once you understand which programming feature you need.
For most homeowners, pairing a handheld remote requires only the PRGM/SET button and a few presses on the remote. Keypad programming involves creating a PIN, while HomeLink and Aladdin Connect use separate pairing procedures.
Remember that changing remote settings does not require adjusting the garage door’s opening or closing limits. These settings should only be changed when necessary and after checking the door’s mechanical condition.
If the Genie 7155 still does not respond after following the correct programming instructions, inspect the remote battery, indicator lights, safety sensors, and power connection.
For additional assistance, consult the official Genie 7155 product and manual page or contact Genie customer support.