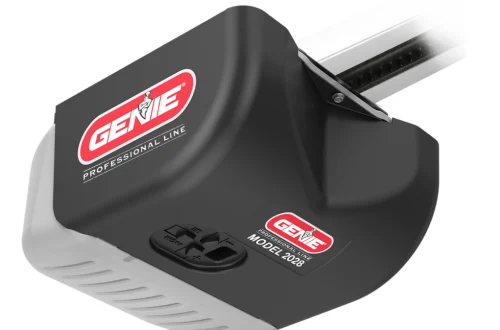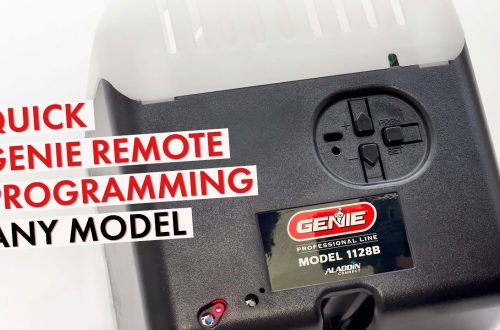


A Chamberlain garage door opener remote makes everyday life easier. You can open or close your garage without leaving your vehicle. However, when the remote suddenly stops responding, it can become frustrating, especially when you are trying to leave home or return after a long day.
If your Chamberlain garage door opener remote is not working, the problem may be easier to fix than you think. A weak battery, activated lock mode, lost programming, radio interference, or an incompatible remote can prevent the garage door from responding.
Sometimes the problem is not with the remote at all. The garage door opener may have lost power, the safety sensors may be misaligned, or the motor unit may need professional attention.
The good news is that you can diagnose many of these problems without replacing your entire garage door opener.
In this guide, you will learn how to troubleshoot a Chamberlain remote, replace its battery, check the Learn button, reprogram the remote, fix signal problems, and identify when professional repair is necessary.
Quick Answer: How to Fix a Chamberlain Garage Door Opener Remote Not Working?
If your Chamberlain remote has stopped responding, follow these simple steps:
- Check whether the wall-mounted garage door button works.
- Replace the remote battery with the correct type.
- Disable Lock Mode or Vacation Mode.
- Test the remote while standing close to the opener.
- Check for radio interference from LED lights and nearby electronics.
- Reprogram the remote using the Learn button.
- Check whether the remote is compatible with your opener.
- Inspect the opener’s hanging antenna wire.
- Examine the safety sensors if the garage door opens but will not close.
- Test another compatible, programmed remote to identify the faulty component.
Chamberlain recommends checking lock mode, batteries, range, programming, and other remotes when the wall-mounted control works normally. Remote Does Not Work
Why Is My Chamberlain Garage Door Opener Remote Not Working?
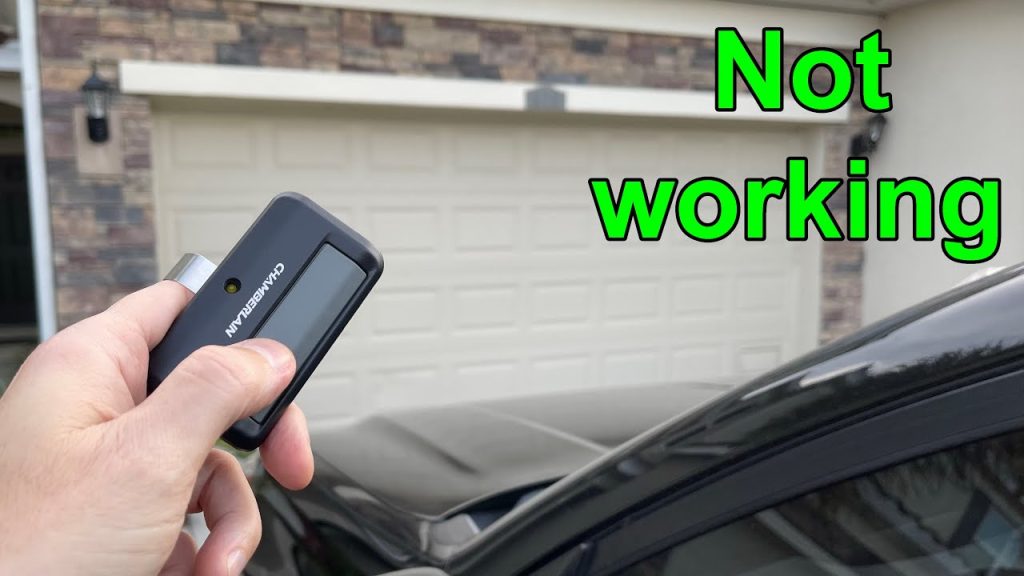
Before starting repairs, you should understand the common reasons behind the problem.
A handheld Chamberlain remote sends a wireless signal to the receiver inside your garage door opener. When the opener recognizes the signal and its safety conditions are satisfied, it activates the motor.
If the remote cannot transmit properly or the opener cannot recognize the command, the door will not respond.
Common problems and their solutions
| Problem | Possible cause | Recommended solution |
|---|---|---|
| Remote does not respond at all | Dead battery | Replace the battery |
| Wall switch works, but remote does not | Lock mode or remote issue | Check Lock Mode and reprogram |
| Remote works only near the opener | Weak signal or interference | Test battery and nearby electronics |
| Remote stopped after power outage | Opener issue or lost programming | Check power and test pairing |
| New remote will not connect | Compatibility or setup issue | Check model and Learn button |
| Remote opens but will not close the door | Safety sensor problem | Check sensor alignment |
| All remotes stopped working | Lock mode, interference, or opener issue | Test wall switch and receiver |
| Remote works only when lights are off | Electrical or radio interference | Test opener lighting |
| Remote responds occasionally | Weak battery or poor radio reception | Check battery and antenna |
Identifying the exact symptom can save time and prevent unnecessary replacement costs.
Step 1: Check Whether the Garage Door Wall Switch Works
The first step is to determine whether the problem comes from the remote or the garage door opener.
Most Chamberlain systems have a wall-mounted control button inside the garage. This button can help you identify whether the motor unit is functioning.
How to test the wall control?
- Enter the garage using a safe entrance.
- Locate the wall-mounted garage door control.
- Make sure the doorway is clear of people, pets, and objects.
- Press the wall control button once.
- Observe whether the garage door opens or closes.
If the wall switch works: The opener is receiving power and can operate the door. Focus on the remote, lock mode, radio reception, and programming.
If the wall switch does not work: Check the opener’s power supply, wall-control indicator, and diagnostic lights. The problem may involve the opener rather than the handheld remote.
What if neither control works?
Check whether the motor unit is plugged into a working outlet. Also examine the circuit breaker supplying the garage.
A power outage, tripped breaker, faulty outlet, or motor-unit problem may prevent both controls from working.
Do not remove the motor housing or touch electrical components while the unit is powered. If the power supply is working but the opener remains unresponsive, seek professional assistance.
Step 2: Replace the Chamberlain Garage Door Opener Remote Battery
A weak or dead battery is one of the easiest problems to check.
Many Chamberlain remotes use a CR2032 3V coin-cell battery, although the correct battery depends on the remote model.
A depleted battery may cause the remote to stop working completely or respond only when you are close to the garage.
How to change the Chamberlain remote battery?
Step-by-step instructions
- Remove the remote from your vehicle’s visor or keychain.
- Open the battery compartment following the remote’s instructions.
- Carefully remove the old battery.
- Check the battery contacts for damage or corrosion.
- Insert a fresh battery with the polarity facing the correct direction.
- Close the compartment securely and test the remote.
Important battery replacement tips
Always confirm the battery type printed on the old battery or specified in the remote’s manual.
Avoid forcing the battery compartment open because doing so can damage the plastic housing or internal circuit board.
If the remote still does not work after installing a fresh battery, inspect the contacts and confirm that the battery is seated correctly.
Safety note: Coin-cell batteries can cause life-threatening internal injuries if swallowed. Keep new and used batteries away from children, and dispose of used batteries safely.
Chamberlain remote not working after battery change
If the remote stopped working immediately after a battery replacement, check the following:
- Was the replacement battery installed with the correct polarity?
- Is the battery the correct type for the remote?
- Are the battery contacts clean and undamaged?
- Does the remote button feel stuck?
- Does a second programmed remote operate the door?
Replacing the battery normally does not erase programming on a compatible handheld remote. Therefore, you should not assume that reprogramming is necessary every time you install a new battery.
Step 3: Disable Chamberlain Garage Door Opener Lock Mode
Lock Mode, also called Vacation Mode, is an important feature on many Chamberlain garage door openers.
It prevents handheld remote controls from operating the garage door while allowing certain wall-mounted controls to continue working.
This feature is useful when traveling, but it can also be activated accidentally.
Signs that Lock Mode is enabled
You may notice that:
- The wall switch operates the garage door normally.
- Handheld remotes do not operate the opener.
- The wall-control indicator flashes continuously.
- The opener lights flash twice when a remote button is pressed.
These are symptoms described in Chamberlain’s official troubleshooting instructions. support.chamberlaingroup.com
How to turn off Lock Mode?
- Locate the wall-mounted control panel.
- Find the button marked LOCK, if equipped.
- Press and hold the Lock button until the indicator changes to its normal state.
- Release the button.
- Test your handheld remote.
The exact button sequence varies by wall-control model. On some smart panels, the feature is controlled through a menu rather than a dedicated Lock button.
If the remote now operates the garage door, no additional programming should be necessary.
Helpful tip: Check Lock Mode before purchasing a replacement remote. An activated lock feature can make several working remotes appear defective simultaneously.
Step 4: Reprogram the Chamberlain Garage Door Opener Remote
If your Chamberlain remote has a working battery but still fails to activate the door, it may need to be programmed again.
The remote and opener must recognize each other before the door responds.
This is particularly important when installing a new remote, replacing an opener’s logic board, or restoring remotes after their programming has been erased.
How to find the Chamberlain Learn button?
The Learn button is typically located on the back or side of the opener motor unit, often near the hanging antenna wire.
Depending on the model, the button may be white, yellow, purple, red/orange, or green.
How to program a Chamberlain remote using the Learn button?
- Make sure the garage door area is clear.
- Use a stable ladder to reach the motor unit, if necessary.
- Locate the Learn button.
- Press and release the Learn button.
- Within approximately 30 seconds, press the button on the compatible remote you want to program.
- Follow the exact pressing sequence in your remote’s manual if it requires multiple presses or a programming mode.
- Watch for the opener light to flash or listen for two clicks indicating successful programming.
- Test the remote after completing the procedure.
Chamberlain offers several programming methods, including the motor-unit Learn button, compatible wall-control panels, and supported myQ app programming. support.chamberlaingroup.com
Important warning about resetting the opener
Do not press and hold the Learn button unnecessarily.
On many Chamberlain openers, holding this button for an extended period erases stored remote-control and keypad programming.
That means other household remotes may stop working until they are programmed again.
If your goal is simply to add or reconnect one remote, use the normal programming procedure instead of clearing the entire memory.
Step 5: Check Chamberlain Remote Compatibility
Not every Chamberlain remote works with every Chamberlain garage door opener.
Remote compatibility depends on the model, radio technology, and the opener’s supported programming system.
This is especially important when purchasing a universal remote or replacing a older garage door opener remote.
Chamberlain Learn button colors
| Learn button color | Common opener generation | What to check |
|---|---|---|
| White | Newer Security+ 3.0 models | Requires compatible remote technology |
| Yellow | Many Security+ 2.0 models | Match supported remote models |
| Purple | Older Security+ models | Check the official compatibility list |
| Red/Orange | Earlier generations | Confirm model and radio compatibility |
| Green | Older Chamberlain systems | Check support for legacy openers |
The color is an identification clue, not a guarantee that any particular remote will work.
For example, a remote designed for one Security+ generation may not pair with an opener that uses another generation.
Use the official Chamberlain remote compatibility guide to check your opener before purchasing a replacement.
How to check compatibility?
- Find the model number on the garage door opener.
- Locate the Learn button and identify its color.
- Find the model number printed on your remote.
- Compare both devices using Chamberlain’s compatibility information.
- Follow the correct programming instructions for your exact remote.
If you purchased a new remote and it has never worked, compatibility should be one of the first things you verify.
Step 6: Fix a Chamberlain Remote That Works Only at Close Range
Does your remote work inside the garage but stop responding when you reach the driveway?
This usually suggests a radio reception or signal-strength problem.
The remote may still be functioning, but the opener is not reliably receiving its signal from a longer distance.
How to test remote range?
- Stand a short distance from the garage door opener, away from moving parts.
- Press the remote button once.
- Observe whether the garage door responds.
- Move farther away from the opener.
- Repeat the test from several safe locations.
- Compare the results.
If the remote works close to the motor unit but fails farther away, inspect the battery and look for interference.
Chamberlain’s guidance indicates that a properly functioning remote should generally work from approximately two to three car lengths away, although actual range can vary with the environment and installation. Fix Poor Signal and Interference Issues
What causes remote signal interference?
Possible sources include:
- Certain LED light bulbs
- Nearby electrical devices
- Poorly shielded electronic equipment
- Radio-emitting accessories
- Obstructions around the garage
- Problems with the opener’s receiver or antenna
An electronic device installed recently may be responsible if the remote worked normally before the change.
Try identifying whether the problem began after adding new garage lighting or electrical equipment.
Step 7: Check Whether LED Garage Lights Are Causing Interference
One commonly overlooked problem is interference from some LED light bulbs.
Certain bulbs or their electronic drivers may generate radio-frequency noise that disrupts communication between the remote and the garage door opener.
This can make the Chamberlain garage door opener remote appear defective even when the remote itself is working correctly.
How to test for LED light interference?
- Turn off the opener’s light if your control panel allows it.
- Test the remote.
- If the problem continues, disconnect power to the opener before touching its light bulbs.
- Remove the replaceable light bulbs according to the manufacturer’s instructions.
- Restore power and test the remote from a safe location.
- Compare performance with the original setup.
If the remote works consistently when the bulbs are removed, the bulbs may be interfering with the wireless signal.
Replace them with lighting approved or recommended for your opener model.
Chamberlain specifically identifies certain light bulbs as possible causes of remote and keypad problems. support.chamberlaingroup.com
What if the remote works only when the opener lights are off?
The issue may involve the light bulbs, wall control, or logic board.
If replacing the bulbs does not solve the problem, further diagnosis may be necessary.
Built-in LED lighting systems require model-specific troubleshooting. Do not attempt to remove sealed or integrated lighting components.
Step 8: Inspect the Garage Door Opener Antenna
Chamberlain garage door openers commonly have a short antenna wire hanging from the motor unit.
This antenna helps the opener receive signals from compatible handheld remotes.
If the wire has been damaged, trapped inside the housing, or positioned improperly, the remote’s effective range may be reduced.
How to inspect the antenna safely?
- Locate the opener’s motor unit.
- Look for the hanging antenna wire near the Learn button or wiring terminals.
- Check whether the wire is visible and unobstructed.
- Inspect for obvious damage.
- Make sure it has not been accidentally tucked away or covered.
Do not pull, cut, extend, or modify the antenna wire.
If it is broken or missing, contact Chamberlain support or a qualified garage door technician for the proper repair procedure.
Why the antenna matters?
The remote transmitter and the opener’s receiver communicate wirelessly.
A weak connection between them may cause inconsistent responses even with a fresh battery.
If multiple compatible remotes have poor range, investigating the opener’s reception system becomes more important.
Step 9: Check the Safety Sensors if the Remote Opens but Will Not Close the Door
Sometimes the remote works when opening the garage, but pressing it again will not close the door.
This does not necessarily mean the remote is faulty.
Many Chamberlain openers use photoelectric safety sensors near the bottom of the garage opening.
These sensors help prevent the door from closing when an object interrupts the beam.
How to inspect the safety sensors?
- Locate the sensors on both sides of the garage opening.
- Look for objects blocking the beam.
- Remove any dirt, leaves, or other obstructions.
- Gently clean the sensor lenses using a soft, dry cloth.
- Check whether the indicator lights are steady.
- If a sensor appears misaligned, follow the opener’s manual to adjust it safely.
- Test the remote again.
On many Chamberlain models, an opener light flashing 10 times after an attempted closing indicates a safety reversing sensor problem. support.chamberlaingroup.com
Why the garage door opens but does not close?
The safety system is primarily designed to prevent unsafe closing.
Consequently, your garage door may open normally while refusing to close because the sensors detect an obstruction or alignment problem.
Never bypass the safety sensors or disable the automatic reversal system to make the remote work.
If the sensors remain faulty after cleaning and alignment, professional servicing may be required.
Step 10: Troubleshoot a Chamberlain Remote Not Working After a Power Outage
A garage door opener may behave differently after an electrical outage.
However, an ordinary power outage does not automatically erase the remote’s stored programming.
If the remote stopped responding after power was restored, investigate the actual cause before resetting anything.
Step-by-step checks after an outage
- Confirm that electricity has been restored to the garage.
- Check the outlet powering the opener.
- Inspect the relevant circuit breaker.
- Test the wall-mounted control.
- Check the opener’s diagnostic indicators.
- Verify that Lock Mode is disabled.
- Test another programmed remote.
- Reprogram the original remote only when necessary.
If the opener has a backup battery, consult its user manual for battery-related warnings.
A backup battery problem is different from a handheld remote battery problem. Replacing one will not necessarily solve a problem with the other.
When a power outage reveals a bigger issue?
If the motor unit has power but neither the wall button nor the remote works, the opener may have an electrical or control-board fault.
Do not attempt to repair internal electrical components without appropriate training.
Step 11: Test Another Chamberlain Remote Control
Using a second known-working remote is an excellent way to identify whether the original remote is faulty.
This test is particularly helpful when the first remote has a fresh battery and appears to be programmed correctly.
How to compare two remotes?
- Obtain another remote already programmed to the same opener.
- Stand in the same location for both tests.
- Press the first remote.
- Record whether the garage responds.
- Press the second remote.
- Compare the results.
What the results mean?
| Test result | Likely explanation |
|---|---|
| First remote fails, second works | First remote may be faulty or unprogrammed |
| Both remotes fail, wall switch works | Lock mode, interference, lost programming, or receiver fault |
| Both remotes work only nearby | Reception or radio-interference problem |
| Remote works, but door will not close | Investigate the safety system |
| Neither wall switch nor remotes work | Opener power or system fault |
If the second remote works consistently, examine the first remote for button damage, battery-contact problems, or failed programming.
If neither remote works, avoid buying several replacement remotes before checking the opener.
Step 12: Reset the Chamberlain Garage Door Opener Remote Programming
A full programming reset should generally be a later troubleshooting step, not the first solution.
Resetting the opener’s remote memory can help when access credentials must be removed or the stored programming has become a problem.
However, it can also disconnect your other remotes and wireless keypads.
When should you erase the remote memory?
Consider it when:
- You have moved into a home and want to remove unknown remote access.
- A programmed remote has been lost or stolen.
- You intentionally want to rebuild the opener’s authorized remote list.
- Chamberlain’s model-specific troubleshooting instructions direct you to do so.
General reset procedure
- Locate the opener’s Learn button.
- Consult the correct owner’s manual for the memory-erasing procedure.
- Follow the specified Learn-button sequence.
- Confirm that the stored programming has been cleared.
- Program each authorized remote again.
- Reprogram wireless keypads and any other affected accessories.
- Test every device before finishing.
Many models use an extended Learn-button press to erase stored remote controls. The duration and additional steps can differ, especially when accessories or integrated systems are involved.
Do not confuse clearing remote memory with resetting Wi-Fi settings or restoring the entire opener to factory defaults. These are different operations.
Chamberlain Garage Door Opener Remote Not Working but Wall Switch Works
This is one of the most common troubleshooting situations.
When the wall switch operates the garage door normally, it usually indicates that the motor has power and the door can move.
Your next steps should focus on problems that specifically affect wireless controls.
Check these five things first
1. Lock Mode: Verify that the wall-control panel is not preventing wireless operation.
2. Battery: Install a fresh, correctly specified remote battery.
3. Programming: Confirm that the remote is registered with the opener.
4. Radio interference: Test the remote near the motor unit and compare its operating range.
5. Remote compatibility: Verify that the remote supports your opener’s Learn-button technology.
If every handheld remote fails but the wall control works, the problem may be inside the opener’s wireless receiving system.
A qualified technician can help determine whether the receiver or logic board requires repair.
Chamberlain Garage Door Opener Remote Not Working After Battery Change
A remote that fails after a battery change requires a slightly different approach.
Start by checking the battery installation rather than immediately resetting the garage door opener.
Common battery replacement mistakes
A coin-cell battery installed upside down will not provide the intended electrical connection.
Similarly, a battery that is not seated correctly may allow the remote to work occasionally but not reliably.
The battery compartment may also contain damaged or corroded contacts.
In addition, some users accidentally press the wrong remote button after replacing the battery or mistake the battery indicator for a successful radio transmission.
What should you do?
Remove the battery and verify its model number, orientation, and condition.
Then reinsert it according to the instructions.
If the remote has a status light, check whether it responds when the button is pressed. Remember that a light turning on does not prove the remote is transmitting a valid signal.
Next, test a second programmed remote.
If the original remote still fails, consider reprogramming it according to its specific instructions.
Chamberlain Garage Door Opener Remote Not Working Intermittently
An intermittent problem can be more difficult to diagnose because the remote may work perfectly during one test and fail during another.
For example, your garage door may respond normally in the morning but fail when you return home in the evening.
This type of problem is often related to weak batteries, radio interference, or a changing environmental condition.
How to identify an intermittent problem?
Record when and where the remote fails.
Pay attention to whether the opener lights are on, whether other electronics are running, and whether the problem occurs only from a particular vehicle location.
Try the remote with a fresh battery.
Then test it from several positions around the garage.
If the problem started after installing new lights, a camera, or another electronic device, temporarily removing that device from the test environment may help identify the source.
Do not assume that an intermittent remote problem means the entire opener must be replaced.
What If All Chamberlain Garage Door Opener Remotes Stop Working?
When several remotes stop operating the garage door at the same time, it is less likely that every remote has developed the same battery problem simultaneously.
- Instead, investigate shared causes.
- Start by testing the wall switch.
- If it works, check whether Lock Mode has been activated.
- Next, verify whether the opener still recognizes the programmed remotes.
- A recently cleared opener memory may cause every remote to stop responding.
- Radio interference or a receiver problem can also affect multiple remotes.
- If the wall switch does not work either, check the power supply and diagnostic indicators.
- Avoid repeatedly resetting the opener without identifying the actual problem.
Chamberlain Garage Door Opener Remote Flashing Light Meanings
Your garage door opener’s lights can provide useful diagnostic clues.
However, different Chamberlain models use different indicators, so a flashing light should always be interpreted in the context of the specific opener.
| Light or indicator behavior | Possible meaning | Next action |
|---|---|---|
| Main opener light flashes twice after remote command | Lock Mode may be active | Check wall control |
| Main opener lights flash 10 times when closing is attempted | Safety sensor issue on many models | Inspect sensors |
| Learn-button indicator illuminates during programming | Opener is in programming mode | Complete pairing |
| Remote indicator lights but door does not respond | Remote has power, but pairing or signal may fail | Check compatibility and programming |
| Diagnostic LEDs flash in a repeated pattern | Model-specific fault code | Consult owner’s manual |
Chamberlain provides separate diagnostic-code references for different opener generations. support.chamberlaingroup.com
Do not interpret every flashing light as a battery warning. The remote LED, wall-control indicator, Learn-button LED, and main opener lights can communicate different information.
When Should You Replace a Chamberlain Garage Door Opener Remote?
Not every malfunction requires a replacement.
A remote may continue working for years when its buttons, battery contacts, and internal electronics remain in good condition.
However, replacement may be appropriate if the remote is physically damaged or repeatedly fails after reasonable troubleshooting.
Signs that a remote may need replacing
- Buttons are broken or stuck.
- The circuit board has visible damage.
- Battery contacts are badly corroded.
- Water damage has affected the remote.
- The remote fails while another programmed remote works consistently.
- The remote is incompatible with your opener.
Before buying, identify both the opener model and the Learn-button color.
Some older garage door openers support only particular remote technologies.
A universal remote is not automatically compatible with every Chamberlain opener.
How to Prevent Chamberlain Remote Problems?
Preventive maintenance can reduce unexpected remote failures.
1. Check the battery periodically
If your remote begins operating over shorter distances, check the battery before the problem becomes worse.
Replace it with the manufacturer-specified type.
2. Protect the remote from moisture
Avoid leaving the remote where it may become wet or exposed to excessive heat.
Water and extreme temperatures can damage electronic components.
3. Avoid pressing the Learn button unnecessarily
Accidentally erasing opener memory can disconnect multiple devices.
Only use the Learn button when programming or performing a documented reset.
4. Keep safety sensors clean
Dust, dirt, and garage debris can interfere with the safety sensors.
Clean and inspect them regularly without modifying their wiring or bypassing their protective function.
5. Use compatible garage lighting
When replacing garage door opener bulbs, choose the type recommended for your model.
Poorly shielded bulbs can interfere with radio reception.
6. Test the garage door’s safety system
Follow the owner’s manual to test the automatic reversal system and photoelectric sensors.
If the door fails a required safety test, discontinue automatic operation until the problem has been corrected.
When Should You Call a Professional Garage Door Technician?
Although many remote problems are simple, some situations require professional help.
Contact a qualified technician if:
- The opener has power but does not respond to either the wall control or remotes.
- Several compatible remotes fail after correct programming.
- The receiver or logic board appears damaged.
- The garage door moves unevenly, jams, or produces unusual noises.
- Safety sensors cannot be restored to normal operation.
- The door has broken springs, damaged cables, or other mechanical problems.
Garage door springs and cables can remain under dangerous tension even when the opener is disconnected.
Never attempt to adjust or replace these components without specialized training.
If you need additional product support, visit Chamberlain’s official support center.
Frequently Asked Questions About Chamberlain Garage Door Opener Remotes
Why is my Chamberlain garage door opener remote not working?
A Chamberlain garage door opener remote may stop working because of a weak battery, activated Lock Mode, lost programming, radio interference, or an incompatible remote. Begin by checking whether the wall-mounted control operates the garage door. If it does, replace the remote battery and check Lock Mode. Next, test the remote near the opener and reprogram it if necessary. If several remotes fail simultaneously, investigate the opener’s receiver and wireless environment rather than assuming every remote is defective.
How do I reset my Chamberlain garage door opener remote?
To reconnect a Chamberlain garage door opener remote, locate the Learn button on the motor unit and follow the programming instructions for your opener and remote model. Normally, pairing begins by pressing and releasing the Learn button. Then activate the remote using the required model-specific sequence. Avoid holding the Learn button longer than instructed because doing so may erase programmed devices. If you need to clear all remote access, consult the opener’s manual for the correct memory-erasing procedure before proceeding.
Why does my Chamberlain garage door opener remote not work after changing the battery?
The battery may have been inserted incorrectly, the contacts may be damaged, or the replacement battery may be unsuitable for the remote. Open the battery compartment and verify the battery type and polarity. Ensure that it fits securely. Then test the remote again. A normal battery replacement generally does not remove stored programming, so do not assume the remote must be reset. If another programmed remote works, the problem may be isolated to the original handheld device.
Why does my Chamberlain garage door remote work only sometimes?
Intermittent operation often suggests a weak battery, interference, or poor radio reception. Install a fresh battery and test the remote at several distances from the opener. Notice whether the problem occurs when garage lights or other electrical equipment is running. If the remote works reliably near the motor but fails farther away, investigate possible interference and the opener’s antenna. If the remote fails at every distance while another works, the original remote may be damaged.
How do I program a Chamberlain garage door opener remote without a Learn button?
Some compatible Chamberlain systems allow remote programming through a wall-mounted smart control panel or the myQ app. If the wall panel has a programming menu, select the remote programming option and follow the on-screen instructions. Supported Wi-Fi openers may also offer programming through myQ. The correct method depends on your opener model, wall control, and remote. Older systems may still require access to the motor-unit Learn button.
Why does my Chamberlain remote work inside the garage but not from my driveway?
The remote may be experiencing reduced signal range. Weak batteries, interference from certain LED bulbs, surrounding electronics, or a damaged antenna can affect radio reception. Replace the remote battery and test it from several distances. If the remote works near the motor but not from the driveway, inspect the antenna and investigate recently installed electrical devices. Do not modify the radio receiver or antenna yourself.
Can I use a universal remote with a Chamberlain garage door opener?
Yes, many Chamberlain garage door openers support compatible universal remotes. However, compatibility depends on the opener’s model and radio technology. Identify the Learn-button color and check the manufacturer’s compatibility guide before purchasing a new device. Some older universal remotes may not support newer opener systems. Likewise, a new universal remote may not support every older opener. Follow the specific programming instructions provided with the compatible remote.
Why does the Chamberlain garage door opener remote open the door but not close it?
If the remote opens the garage door but cannot close it, inspect the safety reversing sensors. An obstruction, dirty lens, or misaligned sensor can prevent automatic closing. Remove anything blocking the beam and check the sensor indicator lights. On many Chamberlain openers, the main lights flash 10 times when a safety sensor problem prevents closing. Never bypass the sensors to force the garage door to close. Seek professional help if the issue continues.
Why are all my Chamberlain garage door remotes not working?
When all remotes stop working together, check Lock Mode, opener power, lost programming, radio interference, and the receiver. Test the wall-mounted control first. If it works, make sure the Lock feature is disabled. Then test a known-compatible remote and check whether the opener accepts programming. If none of the remotes work despite correct setup, the motor unit may have a receiver-related issue that requires further diagnosis.
Does a Chamberlain garage door opener remote need to be reprogrammed after a power outage?
Usually, a normal power outage does not erase the remote’s programming. If the remote stops working afterward, check the opener’s power supply, wall control, and diagnostic lights. Confirm that Lock Mode is not active. If the opener operates from the wall switch but does not recognize the remote, follow the manufacturer’s troubleshooting sequence. Reprogramming may be necessary if the stored remote memory was cleared, but it should not be the first assumption.
How do I know whether my Chamberlain garage door opener remote is broken?
Start by replacing the battery and inspecting the battery contacts and buttons. Next, test another programmed remote with the same opener. If the second remote works normally while the original fails, the first remote may be defective or incorrectly programmed. Confirm compatibility and attempt proper programming before purchasing a replacement. Visible water damage, broken buttons, and damaged electronic components are additional signs that replacement may be necessary.
Can LED lights stop a Chamberlain garage door opener remote from working?
Yes. Certain LED light bulbs can produce electrical noise that interferes with garage door opener radio signals. If the remote stops working when the opener lights turn on, investigate the lighting. With the opener disconnected from power, remove replaceable bulbs according to the manufacturer’s instructions and test again after restoring power. If the problem disappears, use compatible replacement bulbs. Some cases may involve the opener’s electronics rather than the bulbs alone.
Final Thoughts
A Chamberlain garage door opener remote not working does not always mean that you need to replace the remote or the entire opener.
Start with simple checks such as replacing the battery, testing the wall control, and disabling Lock Mode. If those steps do not work, examine the remote’s programming, compatibility, operating range, and possible radio interference.
If your remote opens the garage door but will not close it, investigate the safety sensors before making changes to the remote.
The most effective approach is to identify the exact symptom, test one possible cause at a time, and follow the instructions for your Chamberlain model.
If the opener still does not respond after these checks, professional diagnosis can help identify a receiver, logic-board, or mechanical fault without unnecessary parts replacement.