

Losing weight can feel difficult when you do not understand how your body responds to different foods. You may eat a healthy breakfast, exercise regularly, and avoid sugary drinks but still struggle to make progress. A continuous glucose monitor (CGM) is a wearable device that shows how your glucose levels change throughout the day. It can help you observe what happens after meals, during exercise, while sleeping, and when experiencing stress.
Many people already use continuous glucose monitoring to manage diabetes. However, interest in using a CGM for weight loss has also grown among people with prediabetes, obesity, and those simply looking to understand their eating habits.
A CGM does not burn calories, measure body fat, or automatically produce weight loss. Its potential benefit comes from helping some people make more informed lifestyle decisions.
In this guide, you will learn how to use a continuous glucose monitor for weight loss, how to attach the sensor, how to understand the readings, what foods to compare, how long a CGM lasts, and whether the technology is worth using.
What Is a Continuous Glucose Monitor?
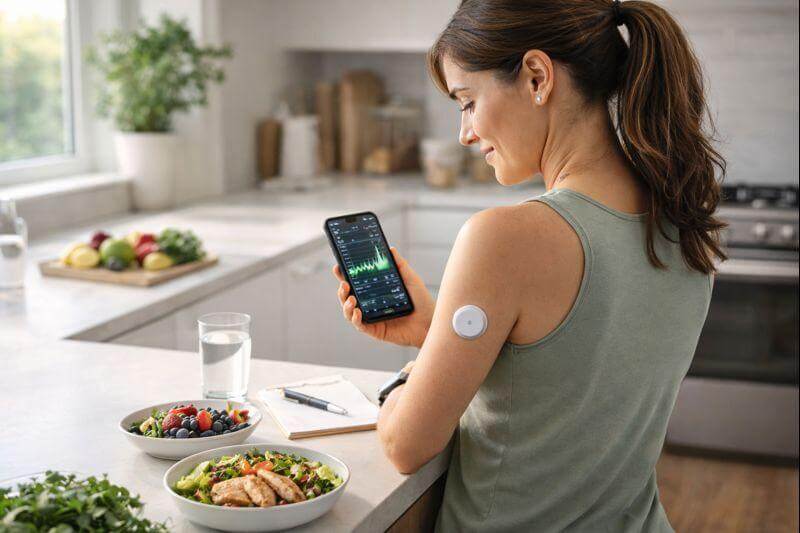
A continuous glucose monitor is a small electronic device that estimates glucose levels throughout the day and night.
Glucose is a type of sugar that your body uses for energy. It comes from foods containing carbohydrates and from glucose produced by the liver.
Your body uses insulin and other hormones to help regulate glucose levels. These levels naturally change after eating, during physical activity, and in response to other daily events.
A CGM collects glucose information using a small sensor placed just under the skin. The readings are sent to a compatible smartphone application or receiver, allowing you to review patterns without performing frequent finger-prick tests.
How Does Continuous Glucose Monitoring Work?
Most CGM systems contain three important parts:
- Sensor: A small wearable component inserted just under the skin to estimate glucose in interstitial fluid.
- Transmitter: Sends the collected data to the receiver or smartphone. Some devices have a built-in transmitter.
- Display or mobile app: Shows glucose readings, trends, historical patterns, and other available features.
For example, suppose you eat oatmeal for breakfast. Your body digests the carbohydrates, and glucose becomes available in your bloodstream.
Your CGM detects related changes in the fluid surrounding your cells. The app then displays a glucose curve that you can compare with the timing and ingredients of your meal.
Because CGMs measure interstitial rather than blood glucose directly, readings can lag behind blood glucose changes, particularly during rapid rises or falls. Cleveland Clinic+1
Continuous Glucose Monitor vs. Traditional Glucose Meter
| Feature | Continuous glucose monitor | Traditional glucose meter |
|---|---|---|
| Measurement | Interstitial glucose | Blood glucose |
| Readings | Repeated automatically | When a finger-stick test is performed |
| Wearable sensor | Yes | No |
| Trend graphs | Usually available | Limited or app-dependent |
| Meal comparison | Easy to visualize over time | Requires repeated manual tests |
| Sensor replacement | Yes | Uses disposable test strips |
| Best use | Patterns and ongoing monitoring | Point-in-time readings and confirmation |
A continuous glucose meter, sometimes used as another name for a CGM, can therefore provide considerably more information about daily glucose patterns than an occasional finger-stick reading.
However, a standard glucose meter remains important for confirming unexpected readings, particularly when symptoms do not match the CGM display.
Can a Continuous Glucose Monitor Really Help With Weight Loss?
A Continuous Glucose Monitor may support weight loss by helping you identify eating and activity patterns. However, the evidence is still developing, particularly for people without diabetes.
Research published in 2026 provides some encouraging findings:
- A 12-week randomized trial involving 35 women with overweight or obesity found greater weight reduction in the group using intermittent continuous glucose monitoring more frequently alongside supervised exercise and dietary counseling.
- A 24-week feasibility trial involving 49 people who had already lost weight found that adding CGM to a dietitian-led maintenance program was associated with a more favorable weight change than the program without CGM.
Both studies were relatively small and included structured lifestyle support. They do not prove that CGM alone leads to weight loss or that every person will benefit. Larger and longer studies are needed. PubMed+1
How CGM Information Might Support Weight Management?
The main potential advantage is awareness.
For example, a CGM might help you notice that drinking a sweetened beverage at breakfast is associated with a larger glucose rise than eating a balanced breakfast with protein and fiber.
You could then switch to an unsweetened drink and compare the results.
This change may also reduce your calorie intake, which can support weight loss over time.
A CGM can also encourage useful behaviors such as walking after meals, eating regular balanced meals, or becoming more aware of late-night snacking.
However, the number displayed on your CGM does not tell you how many calories you have consumed.
A high-calorie meal containing substantial fat might cause a smaller immediate glucose rise than a nutritious serving of fruit. That does not make the high-calorie meal a better choice for weight loss.
The goal is to use Continuous Glucose Monitor data as additional information, not to rank every food as good or bad based on its glucose response.
How to Use a Continuous Glucose Monitor for Weight Loss: Step-by-Step
The following process is designed for beginners who want to learn from CGM readings while maintaining a balanced weight-management approach.
Step 1: Decide Whether a CGM Is Right for You
Before purchasing a continuous glucose monitor, consider your health status and the information you hope to learn.
A CGM might be useful if you want to understand how different meals affect your glucose, have prediabetes, or are participating in a professionally supervised weight-management program.
However, you may not need one to lose weight successfully.
Balanced eating, an appropriate calorie deficit, regular physical activity, adequate sleep, and sustainable habits remain important whether you use a CGM or not.
If you have diabetes, take insulin or medicines that can cause low blood glucose, are pregnant, or have experienced unexplained low glucose readings, speak with your healthcare professional before choosing a device or changing your treatment.
People with a history of disordered eating should also consider whether constant glucose feedback might increase anxiety or food restriction.
Step 2: Choose a Suitable Continuous Glucose Monitor
Several CGM systems are available in the United States. Some require a prescription, while certain over-the-counter devices are designed for people who do not use insulin.
Examples include Dexcom Stelo and Abbott Lingo.
In March 2024, the FDA cleared Dexcom Stelo as an over-the-counter CGM for eligible adults not using insulin. Regulatory indications have subsequently evolved, so the current FDA labeling and device instructions should always guide who can use a particular model. FDA+1
When comparing devices, consider sensor duration, smartphone compatibility, app features, replacement costs, customer support, and whether medical alerts are included.
Most importantly, check whether the device is appropriate for your medical needs. OTC wellness-oriented CGMs generally lack the low-glucose alarms found on many prescription systems and should not replace medically necessary monitoring.
Step 3: Download the CGM Application
After obtaining your device, download its official app using the instructions supplied by the manufacturer.
Create an account, complete any required activation steps, and check that your smartphone is compatible.
Depending on the model, the application may display your current estimated glucose, a trend graph, meal annotations, activity entries, or longer-term reports.
Allow any necessary Bluetooth permissions and follow the manufacturer’s instructions for keeping the app connected.
Do not assume that every Continuous Glucose Monitor model has identical features.
Step 4: Apply the CGM Sensor Correctly
The application process varies by model, but the general steps are straightforward.
- Wash your hands and clean the approved application area.
- Dry the skin completely.
- Open the sensor packaging and prepare the applicator according to the instructions.
- Place the applicator against the approved body site.
- Activate the applicator to insert the small sensor filament.
- Check that the adhesive is firmly attached.
- Complete the activation or pairing process in the app.
Some systems are approved for the upper arm, while others permit additional sites.
Use only the body locations approved for your exact device. Do not apply lotion immediately before sensor placement.
You may feel a brief pinch during insertion, but the sensor should not cause ongoing significant pain.
If you experience substantial bleeding, swelling, persistent pain, or signs of infection, follow device instructions and seek medical advice.
Step 5: Allow the Device to Warm Up
Most CGM devices need a warm-up period before displaying usable readings.
The duration depends on the device. Some are ready within approximately half an hour, while others need longer.
Follow the product’s instructions rather than estimating the warm-up time.
During this period, you can prepare a simple food journal or tracking sheet.
Record the date you applied the sensor and when it should be replaced.
Step 6: Observe Your Normal Glucose Patterns
For the first two or three days, focus on learning your usual routine rather than changing everything immediately.
Continue eating your regular meals and note when you eat, exercise, sleep, or feel unusually stressed.
Look at the general shape of the glucose graph, not only the highest and lowest numbers.
Ask yourself questions such as:
- Does my glucose rise after breakfast?
- How does it respond to lunch compared with dinner?
- What happens after a walk?
- Are my readings different after a poor night’s sleep?
- Do I notice similar patterns on repeated days?
This baseline makes future comparisons more meaningful.
Remember that a rise after eating carbohydrates is normal. It is not automatically evidence of poor metabolic health or a reason to eliminate the food.
Step 7: Start Comparing Different Meals
Once you understand your usual glucose trends, begin experimenting with small changes to balanced meals.
For example, you might compare:
| Meal experiment | Original meal | Alternative meal |
|---|---|---|
| Breakfast | Sweetened cereal and juice | Oatmeal, plain yogurt, and berries |
| Lunch | Large refined-grain meal | Smaller grain portion with beans and vegetables |
| Snack | Sweetened beverage and biscuits | Water, fruit, and nuts |
| Dinner | Large serving of plain pasta | Moderate pasta portion with vegetables and protein |
These are examples, not guaranteed ways to lower your glucose. Individual responses vary.
When comparing meals, try to keep other conditions relatively consistent. Portion size, physical activity, stress, sleep, and the timing of your last meal can all influence glucose readings.
Avoid drawing conclusions from a single meal.
Step 8: Check the Glucose Trend After Eating
Look at the graph before eating, then observe how it changes over the next few hours.
You may notice a gradual rise, a more pronounced peak, or a relatively flat response.
An illustrative glucose pattern might look like this:
Example glucose response after a mealIllustrative data only. Not an individual’s medical results or a prescribed target.
70 mg/dL92.5 mg/dL115 mg/dL137.5 mg/dL160 mg/dLBefore30 min60 min90 min120 min180 min
Example only; normal responses vary.
The example begins at 92 mg/dL, rises after eating, and gradually returns toward the initial level.
A glucose curve is more useful when interpreted together with your complete meal and your overall health rather than treated as a pass-or-fail score.
Clinical time-in-range targets used for people with diabetes should not automatically be applied to healthy individuals without diabetes.
Step 9: Use the Information to Improve Meal Balance
After collecting several days of information, choose one practical change.
For example, you might add protein to breakfast, replace a sugary drink with water, increase vegetable portions, or select higher-fiber carbohydrates.
Avoid removing all carbohydrates from your diet simply to produce a flatter CGM graph.
Whole grains, beans, fruit, and other carbohydrate-containing foods can contribute valuable fiber, vitamins, minerals, and energy.
Your weight-management choices should consider nutritional quality, portion size, enjoyment, affordability, and long-term sustainability.
Step 10: Monitor Exercise, Sleep, and Stress
Your glucose patterns depend on more than food.
Physical activity can change how the body uses glucose. A walk after eating may produce a different pattern from sitting for several hours.
Poor sleep, stress, illness, and certain medications can also influence readings.
Compare your glucose trends on days with different routines, but avoid assuming one change caused every difference.
Your aim is to identify habits that improve your overall health and are realistic to maintain.
Step 11: Track Actual Weight-Loss Progress
A CGM cannot determine whether you are losing body fat.
To evaluate your weight-management plan, you need other indicators.
Consider recording body weight at consistent intervals, waist circumference when appropriate, physical activity, eating habits, sleep quality, and how you feel.
For many adults, a gradual, sustainable approach to weight loss is preferable to rapid restriction.
Changes in body weight should be interpreted over several weeks because hydration, digestion, and other factors can cause daily fluctuations.
Step 12: Review the Results and Decide What to Continue
At the end of your initial monitoring period, review the experiments you completed.
Identify which changes were practical, affordable, enjoyable, and consistent with your health goals.
You may find that regular walks are easy to maintain or that a balanced breakfast helps you feel more satisfied.
You may also discover that your CGM did not provide enough additional insight to justify continued use.
Both conclusions are useful.
The most important result is a set of sustainable habits, not a perfect glucose graph.
How Long Does a CGM Last?
One of the most common questions about continuous glucose monitoring is how long the sensor can stay attached to the body.
Most disposable CGM sensors last approximately 10–15 days, although the exact duration varies by model. Some implantable systems can last considerably longer and require professional placement.
CGM Sensor Lifespan Comparison
| CGM device | Maximum sensor wear | Device category |
|---|---|---|
| Dexcom Stelo | Up to 15 days, plus a 12-hour grace period | Over-the-counter |
| Abbott Lingo | Up to 14 days | Over-the-counter |
| FreeStyle Libre 3 Plus | Up to 15 days | Prescription |
| FreeStyle Libre 3 | Up to 14 days | Prescription |
These durations come from manufacturer documentation and may change with future products or labeling. A sensor can also stop working earlier than its advertised maximum life. Stelo by Dexcom+3
How to Make Your CGM Sensor Last Longer?
You can help reduce the risk of early sensor detachment by cleaning and drying your skin before application.
Avoid applying body oil, lotion, or moisturizer underneath the adhesive. Make sure clothing does not repeatedly catch the device.
If your manufacturer recommends an additional adhesive patch, use an approved option and follow the instructions carefully.
During swimming, bathing, or exercise, observe the water-resistance and activity restrictions for your model.
Never extend sensor use beyond the manufacturer’s approved period.
14-Day CGM Weight-Loss Learning Plan for Beginners
A two-week monitoring period can provide an introduction to how different lifestyle choices affect your glucose.
The following plan is an educational example rather than a medical treatment program.
| Day | Activity | What to learn |
|---|---|---|
| 1 | Apply and activate the sensor | Understand setup and basic readings |
| 2 | Record normal meals | Establish a baseline |
| 3 | Observe breakfast | Identify usual morning patterns |
| 4 | Compare two balanced breakfasts | Explore differences in meal responses |
| 5 | Record lunch and dinner | Understand daily changes |
| 6 | Take a comfortable walk after a meal | Observe activity-related patterns |
| 7 | Review the first week’s journal | Identify repeated observations |
| 8 | Compare beverage choices | Explore added sugar and portion differences |
| 9 | Include more fiber in a meal | Observe how meal composition matters |
| 10 | Record sleep and stress | Identify possible non-food influences |
| 11 | Compare different portion sizes | Learn about portions without excessive restriction |
| 12 | Repeat an earlier meal experiment | Check whether a pattern is consistent |
| 13 | Review weight and activity habits | Evaluate overall progress |
| 14 | Summarize what you learned | Select sustainable changes |
What Should You Record?
A simple tracking journal can help you understand the data.
| Date | Meal or activity | Glucose observation | Other factors | Practical takeaway |
|---|---|---|---|---|
| Monday | Oatmeal breakfast | Moderate rise | Slept well | Repeat for comparison |
| Tuesday | Sweetened coffee | Larger rise | No morning walk | Try less added sugar |
| Wednesday | Lunch followed by a walk | Different post-meal curve | 15-minute walk | Repeat on another day |
| Thursday | Late dinner | Glucose remained elevated longer | Poor sleep | Review timing and portion size |
These are illustrative observations rather than actual patient data.
You do not need to document every minute of your day. Recording a few meaningful events is often more manageable than constantly checking numbers.
Best Foods to Eat While Using a CGM for Weight Loss
The best diet is not necessarily the one that produces the smallest glucose rise.
A healthy eating pattern needs to provide adequate nutrients, support your energy requirements, and be sustainable.
1. Protein-Rich Foods
Protein supports the maintenance of muscle during weight loss and can contribute to fullness.
Examples include eggs, fish, chicken, tofu, beans, lentils, and plain yogurt.
Combining protein-rich foods with vegetables and appropriate carbohydrate portions can help create balanced meals.
2. Fiber-Rich Foods
Fiber supports digestive health and can contribute to fullness.
Good sources include oats, lentils, beans, vegetables, berries, and whole grains.
A CGM may help you explore how different combinations of these foods affect your glucose readings.
3. Vegetables and Fruits
Vegetables and fruits provide important vitamins, minerals, water, and fiber.
Do not eliminate fruit merely because it contains natural sugar or because you notice a temporary glucose rise after eating it.
Choose a variety of produce and consider the whole meal rather than judging individual foods exclusively by glucose response.
4. Healthy Fat Sources
Nuts, seeds, olive oil, and avocados can be part of a nutritious eating pattern.
However, fats are energy-dense, so portions remain relevant for weight management.
A meal high in fat may produce a smaller immediate glucose increase even when it provides substantial calories.
This illustrates why glucose readings alone cannot determine whether a meal supports weight loss.
Common Mistakes When Using a CGM for Weight Loss
Mistake 1: Treating Every Glucose Spike as Dangerous
Glucose normally rises after eating, especially after carbohydrate-containing foods.
A single increase does not necessarily indicate a medical problem.
Focus on overall patterns and seek medical advice for consistently concerning readings rather than diagnosing yourself.
Mistake 2: Assuming Lower Glucose Always Means Better Weight Loss
Lower glucose readings do not automatically indicate greater fat burning.
Weight management depends on several factors, including energy intake, physical activity, individual health, and long-term consistency.
Do not deliberately seek low glucose levels.
Mistake 3: Eliminating Nutritious Carbohydrates
Avoiding fruit, legumes, and whole grains solely to flatten your CGM chart could reduce the nutritional quality of your diet.
Make dietary changes based on overall health benefits instead of one device metric.
Mistake 4: Ignoring Calories and Portion Sizes
A CGM cannot measure the calories in food or determine how much energy your body has stored.
For example, nuts may have a modest direct glucose effect, but large portions can still contribute considerable calories.
The CDC explains that weight loss generally requires a calorie deficit, supported by healthy nutrition and physical activity. CDC+1
Mistake 5: Trusting Every Reading Without Question
Sensor readings can sometimes be inaccurate, particularly during rapid changes or when pressure is applied to the sensor.
A falsely low overnight reading may occur when you sleep directly on the device.
Some substances and medications can interfere with particular CGM systems.
Check the manufacturer’s safety instructions, and confirm unexpected values with an appropriate blood glucose meter when recommended.
Mistake 6: Checking Glucose Too Frequently
Some people become anxious when constantly watching the glucose graph.
Repeated checking may encourage unnecessary food restriction or excessive exercise.
If tracking begins to interfere with your eating habits, sleep, or mental well-being, consider stopping nonessential monitoring and discussing your concerns with a healthcare professional. Healthline+1
Is a CGM Better Than a Fitness Tracker for Weight Loss?
A CGM and a fitness tracker provide different types of information.
| Feature | CGM | Fitness tracker |
|---|---|---|
| Glucose trends | Yes | Generally no |
| Step counting | Generally no | Yes |
| Exercise tracking | Limited or integrated through apps | Common feature |
| Heart-rate tracking | No | Often included |
| Sleep tracking | Generally no | Often included |
| Food-related glucose changes | Yes | No |
| Direct body-fat measurement | No | No |
For someone whose main goal is weight loss, a fitness tracker may help encourage regular physical activity without requiring a disposable glucose sensor.
A CGM may offer additional information about glucose responses, particularly when there is a specific reason to investigate those patterns.
Neither device replaces balanced nutrition, consistent physical activity, or professional medical care when needed.
Who Should Be Careful About Using a CGM for Weight Loss?
Not everyone needs continuous glucose monitoring.
People with diabetes who use insulin or other medicines that can cause hypoglycemia need devices and treatment plans appropriate to their medical condition.
OTC wellness devices without low-glucose alarms should not be used as substitutes for prescribed medical monitoring.
Anyone experiencing frequent dizziness, unexplained sweating, fainting, confusion, or symptoms suggestive of low blood sugar should seek medical evaluation instead of attempting to solve the problem through weight-loss experiments.
People who are pregnant, have a history of eating disorders, or have complex medical conditions should discuss CGM use with an appropriate healthcare professional.
CGM readings also cannot diagnose diabetes or prediabetes on their own. Clinicians use established tests, such as laboratory A1C and plasma glucose tests, to evaluate these conditions.
If you experience severe confusion, seizures, loss of consciousness, or other emergency symptoms, seek emergency medical assistance.
Frequently Asked Questions About Using CGM for Weight Loss
How do you use a CGM for weight loss?
Start by choosing an appropriate device and applying its sensor according to the manufacturer’s instructions. Record your regular meals and activities, then compare glucose patterns over several days. Use the information to guide practical changes such as balanced meals, appropriate portion sizes, and regular activity. Track actual weight-management progress separately because CGM data cannot directly measure fat loss.
Can you use a continuous glucose monitor without diabetes?
Yes. Certain over-the-counter CGM systems are available for people without diabetes who want to understand their glucose patterns. However, availability does not mean everyone needs one. Research into routine CGM use for weight loss among otherwise healthy people remains limited.
How long does a CGM last?
Most commonly used disposable CGM sensors last about 10–15 days, depending on their model. For example, Abbott Lingo is designed for up to 14 days, while Dexcom Stelo and FreeStyle Libre 3 Plus are designed for up to 15 days. Always follow the product’s current instructions.
Does a continuous glucose monitor help burn fat?
No. A CGM measures glucose trends and does not burn fat or increase calorie expenditure by itself. It may support changes in eating or exercise habits, but its readings cannot tell you whether your body is losing fat at a particular moment.
What should my blood sugar be for weight loss?
There is no established universal CGM glucose target specifically for weight loss in people without diabetes. Glucose goals used to manage diabetes are medical targets and should not automatically be applied to everyone. Ask a healthcare professional about appropriate readings if you have diabetes, prediabetes, or unexplained glucose abnormalities.
Can a CGM tell me which foods are making me gain weight?
Not directly. A CGM can show how glucose changes after eating, but it does not measure calories or determine whether food causes weight gain. Consider portion size, nutritional quality, physical activity, and overall eating patterns when making decisions.
How many days should I wear a CGM to understand my eating habits?
A 10–14-day period can provide useful observations about routine meals and activities. However, there is no established minimum duration proven to produce weight loss in people without diabetes. A longer monitoring period is not necessarily better, especially if you have already learned what you needed.
Final Thoughts
Learning how to use a continuous glucose monitor for weight loss can help you better understand how your eating habits, exercise, sleep, and daily routine relate to glucose changes.
The most practical approach is to choose a suitable device, wear it correctly, record regular meals, compare repeated patterns, and make small improvements that you can maintain.
Remember that continuous glucose monitoring is an information tool rather than a weight-loss treatment.
A flatter glucose graph does not automatically mean a healthier diet, and the technology cannot replace appropriate nutrition, physical activity, sufficient sleep, or medical advice.
Use the information to understand your body, not to become overly concerned about every glucose fluctuation.
For many people, the greatest value of a Continuous Glucose Monitor may be learning a few useful habits and then continuing those habits without needing to monitor glucose indefinitely.